MEmu
English
  • 简体中文
  • 新马简中
  • 繁體中文
  • Español
  • Português
  • Italiano
  • Français
  • Deutsch
  • Pусский
  • Indonesia
  • Tiếng Việt
  • Melayu
  • ภาษาไทย
  • 日本語
  • 한국어
  • हिन्दी
  • العَرَبِيَّة
  • Türkçe
  • Polski
  • Čeština
  • Ελληνικά
  • Українська
  • বাংলা
  • اردو‎
  • Nederlands
Support Business
Blog
  • App Reviews
  • Game Reviews
  • Game Guides
  • Game News
  • MEmu Latest
  • Release Notes
Game Center
  • Strategy
  • Role Playing
  • Action
  • Adventure
  • Racing
  • Casual
  • Card
  • Arcade
  • Sports
  • Simulation
  • Puzzle
  • Music
  • Word
  • Board
  • Casino
  • Trivia
  • Educational
  • Pre-registration
  • category_
  • category_null
  • Game Center
  • Blog
  • Business
  • Support
MENU
  • Home
  • App Reviews
  • Game Reviews
  • Game News
  • Game Guides
  • Redeem Codes
  • MEmu Latest
  • Release Notes
Skip to content
  • Home
  • App Reviews
  • Game Reviews
  • Game News
  • Game Guides
  • Redeem Codes
  • MEmu Latest
  • Release Notes
Download
Neverness to Everness Adler Build Guide
Neverness to Everness Jiuyuan Build Guide
Neverness to Everness Baicang Build Guide
Neverness to Everness Haniel Build Guide
Arknights: Endfield v1.2 “At the Wake of Spring” arrives April 17 with new Operators, regions, and systems.

Tag: lang-en

Game Guides, Game News, Game Reviews   

Wuthering Waves 2.8 Chisa Kit, Echo Set, Signature Weapon Leak

2025-10-24
Game Guides, Game News, Game Reviews   

Wuthering Waves (WuWa) Chisa Release Date and Info

2025-10-17
After Editing, Game Guides, Game News, Game Reviews   

Wuthering Waves Promo Codes for October 2025

2025-10-17
Game Guides, Game News, Game Reviews   

Wuthering Waves Version 2.7 Dawn Breaks on Dark Tides update to release on October 9th, 2025

2025-09-29
Game Guides, Game News, Game Reviews   

Wuthering Waves (WuWa) Qiuyuan Release Date and Info

2025-09-26
Game Guides, Game News, Game Reviews   

Wuthering Waves 2.7 Banners & New Characters Leaked!

2025-09-04
Game Guides, Game News, Game Reviews   

All Codes for Wuthering Waves (WuWa) as of July 2025

2025-07-21
Game Guides, Game News, Game Reviews   

All Codes for Wuthering Waves (WuWa) as of May 2025 on PC Emulator

2025-05-26
Game Guides, Game News   

Wuthering Waves Version 2.0 Banners: Resonators, banner order, dates, and more

2024-11-26
Game News   

Wuthering Waves announces second round of closed beta test for Android

2024-01-18

SEE MORE

Posts pagination

« 1 2

Recent Posts

  • Neverness to Everness Adler Build Guide

    Looking for a Neverness to Everness Adler build guide that actually delivers results? We've got you covered. Whether you're searching for an Adler build NTE or simply the best Adler build, you're likely after one thing: a complete roadmap that transforms this easy-to-play butler into a team-wide powerhouse. Adler dishes out shields, consistent DoT damage, and immense value without demanding perfect execution. ContentsNeverness to Everness Adler – OverviewWho Is Adler and Why Build Him in Neverness to Everness?Adler's Full Skill Kit and Playstyle ExplainedBest Adler Build: Weapons, Arcanum Sets, and Stat PrioritiesOptimal Adler Team Comps and SynergiesRotation Guide and Combat Tips for Maximum EfficiencyIs Adler Worth Building in 2026?Conclusion Whether you're an NTE beginner or a seasoned player, this comprehensive Neverness to Everness Adler build guide will teach you how to master him with the most effective setups available. Neverness to Everness Adler – Overview Adler stands out as one of the most universally useful characters in Neverness to Everness. As an A-Rank Incantation support/sub-DPS, his kit blends defensive utility with offensive pressure through Karma stacking and team-wide Blessing shields. He scales directly off DEF for both damage output and shield strength, making him incredibly forgiving for F2P and low-spender accounts while scaling beautifully into late-game content. If you've consulted our Neverness to Everness tier list, you'll understand why Adler consistently lands in S-tier: he fits into almost every team composition, excels in both boss fights and mob farming, and requires minimal mechanical skill to pilot effectively. Who Is Adler and Why Build Him in Neverness to Everness? Adler, the refined butler of Eibon Antique Shop, brings calm reliability to every encounter. His Incantation element focuses on DEF-scaling damage and utility, with Sunya orbs and elegant cane strikes that feel both smooth and satisfying. In a game where team survivability often dictates success or failure, Adler's ability to apply a team-wide shield while simultaneously dealing damage-over-time makes him a staple for story progression and endgame anomaly hunts alike. If you're researching Adler skills Neverness to Everness or the optimal NTE Adler rotation, you must first understand exactly how his Karma mechanic functions—it's the core of his power. Unlike high-investment DPS characters, Adler delivers immediate impact right out of the box, which is precisely why he appears in so many early-game and budget team recommendations. Adler's Full Skill Kit and Playstyle Explained Understanding Adler's abilities is the foundation of any strong Neverness to Everness Adler build guide. Here's the complete breakdown: Basic Attack: DeliverancePerforms up to 5 consecutive cane strikes dealing Incantation DMG. Each hit generates 1 Karma stack (maximum 20 stacks). Basic Attack: LiberationEnters aim mode for precise, single-target Incantation DMG. Grants 2 Karma stacks per use. Basic Attack: IgnoranceA plunging attack that deals area Incantation DMG on impact, scaling with fall height up to 200%. Grants 1 Karma stack. Skill: Evil's BaneConsumes all accumulated Karma stacks to unleash an AoE Incantation blast followed by a 10-second DoT (5 ticks). Each Karma stack provides a 2% Skill DMG bonus, up to a maximum of 40%. Additionally, this skill applies the Blessing team-wide shield, which scales based on Adler's Max DEF and has a set duration. Ultimate: TranquilitySummons 5 Sunyas that strike all enemies in a wide area for massive Incantation DMG. Dodge Counter / Critical Riposte: RevelationTriggers after a perfect dodge during Deliverance, dealing bonus damage and granting 1 Karma stack. Playstyle Tip: Adler functions as a "set it and forget it" support. Build Karma quickly with normal attacks or plunges, then press Skill for an instant shield and applied DoT. His low difficulty rating (1/5 in most tier lists) makes him perfect for learning the Esper Cycle combat system while still contributing meaningful damage. Best Adler Build: Weapons, Arcanum Sets, and Stat Priorities The best Adler build NTE revolves around maximizing DEF (for both shield strength and personal damage), Skill DMG, and Incantation bonuses. Because Adler's damage and utility scale directly with his defensive stats, you don't need perfect Crit substats to excel. Recommended Weapons Signature Arc Weapon (5-star): The highest priority for endgame investment. Provides significant DEF scaling, Skill DMG%, and specific Karma synergy. Dangerous Game (B-Rank Synthesis Alternative): An excellent F2P-friendly option with strong base stats and Incantation amplification. Crafted or Event Weapons: Any early filler that boosts DEF or team shields works well. Best Arcanum Sets (Artifact Equivalents)Adler benefits heavily from sets that reward DEF investment. Focus on: Primary Set (4-Piece): Any set granting DEF% or Incantation DMG bonuses. Prioritize sets that utilize Type III Tetris Pieces, as each grants Adler an additional +12% DEF. Secondary Set (2-Piece): Complementary pieces that boost Skill DMG or shield duration/effectiveness. Stat Priority OrderUse these stats to guide your upgrades and sub-stat rolls: PriorityMain Stat (Sand/Glove/Circlet)Sub-Stats (Ideal Order)Why It Matters1DEF%DEF% → Incantation DMG%Core scaling for shield strength and DMG.2Skill DMG%Skill DMG% → HP% or ATK%Amplifies Evil's Bane output.3Incantation DMG%Energy Recharge (if needed)Faster Ultimate uptime and smoother Karma flow.4Energy RechargeCrit Rate/DMG (Bonus only)Improves rotation comfort. Target Goal: Aim for 2,000+ DEF and solid Skill DMG% before worrying about Crit stats. This setup makes Adler durable enough to frontline while effectively supporting the team. Optimal Adler Team Comps and Synergies One of the primary reasons players search for Adler team comps is his unparalleled flexibility. He slots seamlessly into almost any lineup thanks to his shields and DoT. Here are proven global meta teams: Beginner-Friendly Budget Team: Adler + Main DPS (e.g., free Traveler) + Any Sub-DPS + Battery Support. High-Value Synergy: Adler + Nanally (Main DPS) + Zero + Hathor. Adler's Blessing shield ensures team survival while Nanally's follow-up attacks detonate for massive damage. Boss-Melting Setup: Adler + Baicang (Execute DPS) + Jiuyuan (Battery) + Sakiri. Perfect for high-stagger content where shields prevent unexpected wipes. F2P All-Rounder: Adler + Skia + Fadia + Free Units. Ideal for story progression and open-world exploration. Adler's DoT and shielding capabilities shine brightest when paired with characters who benefit from sustained survivability and grouped enemy positioning. Rotation Guide and Combat Tips for Maximum Efficiency Here is a simple NTE Adler rotation that excels in 90% of content: Swap to Adler → Build 15–20 Karma stacks using 2–3 Deliverance combos or plunging attacks. Cast Skill (Evil's Bane) → Consume stacks for maximum damage, apply the instant team shield, and trigger the DoT effect. Swap to Main DPS while Adler's DoT ticks and the Blessing shield holds. Use Ultimate (Tranquility) when energy is full for a large AoE burst. Repeat. Note that Adler's Karma stacks do not expire, allowing you to pre-stack them before engaging difficult encounters. Pro Tips: Utilize plunging attacks from heights for rapid Karma generation and bonus impact damage. Perfect dodges trigger Revelation, granting free stacks and extra damage. During open-world exploration, Adler's shield makes anomaly encounters significantly safer. Adler Awakenings and Long-Term Investment Awakenings unlock massive power spikes for Adler: Levels 1–3: Faster Karma generation and noticeably stronger shields. Levels 4–6: Grants a team-wide Incantation DMG bonus while Blessing is active, along with extended shield duration (up to 12 seconds at maximum rank). Is Adler Worth Building in 2026? Absolutely. In the current global meta, Adler remains one of the highest-value A-Rank characters available. This is due to his straightforward, low-execution gameplay, reliable team-wide shields, and consistent DoT that functions effectively in all content types. Whether you're clearing daily commissions, tackling challenging bosses, or exploring the vast open world, a well-built Adler makes every activity smoother and more manageable. Conclusion Follow this Neverness to Everness Adler build guide step-by-step, and you'll have a support character capable of carrying you from the earliest story chapters all the way through the most demanding endgame content. For more NTE guides and resources, be sure to check out our Neverness to Everness Reroll Guide as well.

  • Neverness to Everness Jiuyuan Build Guide

    Are you searching for the ultimate Neverness to Everness Jiuyuan build guide to dominate the open-world streets of Hethereau? You've come to the right place. Jiuyuan stands out as one of the most versatile S-Rank characters in Neverness to Everness (NTE), seamlessly blending high-mobility ranged DPS with crowd control and team-healing support. ContentsJiuyuan's Playstyle: Ranged Hybrid DPS with Built-In Healing and ControlFull Skill Breakdown for Jiuyuan in Neverness to EvernessBest Build for Jiuyuan: Weapons, Arcs, Stat Priorities, and GearBest Teams for Jiuyuan: Synergies That Maximize Her Hybrid RoleWhy Jiuyuan Is Worth Building in Neverness to EvernessConclusion Whether you're a beginner pulling her on her debut banner or a veteran optimizing for endgame content, this comprehensive NTE Jiuyuan best build covers everything you need: her full skill kit and playstyle, optimal team synergies, gear priorities, and advanced gameplay tips. Let's get started. Jiuyuan's Playstyle: Ranged Hybrid DPS with Built-In Healing and Control Jiuyuan excels as a ranged Anima character who keeps enemies at a safe distance while applying debilitating marks and restoring team health on the fly. Her kit revolves around Rose Pact Bullets and the Lethal Rose Pact debuff, which amplifies damage against marked targets and enables powerful follow-up attacks. This hybrid design makes her perfect for players who value fluid, safe positioning without sacrificing team sustain. In most team compositions, Jiuyuan eliminates the need for a dedicated healer. She truly shines in mid-to-late game scenarios where mob-clearing speed and boss survivability are paramount. Her heavy attack even morphs into a spinning tornado of bullets for wide area coverage, allowing her to handle crowds while passively healing allies through Anima-triggered effects. As of now, her kit remains unchanged from the refined beta, emphasizing mobility, Break reduction, and consistent Anima damage output. Full Skill Breakdown for Jiuyuan in Neverness to Everness Mastering Jiuyuan's abilities is the foundation of any successful NTE Jiuyuan guide. Here's exactly how her kit works: Basic Attack: When Secrets Take ShapeDual-wield pistols for up to 5 consecutive hits, dealing Anima DMG. Each full sequence grants 2 Rose Pact Bullets, and the final strike applies Lethal Rose Pact to the target, increasing all incoming damage by 8% while the mark persists. Info-Guided Arts (Hold Basic Attack)Auto-targets and fires rapid bullets while consuming Rose Pact Bullets. This attack prioritizes enemies already affected by Lethal Rose Pact for maximum efficiency and sustained DPS. Skill: Cross-Pattern FireSwings both arms to unleash a cross-shaped barrage, binding multiple targets with Lethal Rose Pact. This ability deals Anima DMG, reduces enemy Break resistance, and grants 2 additional Rose Pact Bullets. Intel Hunter (Dash Skill)Dashes across the battlefield, pulling a target into close range for crowd control. Deals multiple instances of Anima DMG, grants 4 Rose Pact Bullets, and applies Lethal Rose Pact. UltimateUnleashes a barrage of multiple Anima DMG instances. Grants 4 Rose Pact Bullets, applies Lethal Rose Pact to all hit targets, and provides team-wide healing over time through her Anima resonance. Her passive talents further enhance healing on Anima hits and boost Break efficiency, solidifying her role as a true hybrid who contributes significant damage while keeping the squad alive. Best Build for Jiuyuan: Weapons, Arcs, Stat Priorities, and Gear For the optimal Jiuyuan build, focus on amplifying her Anima damage, Crit scaling, and bullet generation. Prioritize Arcs (weapons) that synergize with pistol/ranged combat and enhance Rose Pact mechanics. Recommended Signature Arc:Jiuyuan's limited S-Rank pistol Arc is the clear top-tier choice. It directly boosts Anima DMG, increases Rose Pact Bullet generation, and extends Lethal Rose Pact duration and effects. If you cannot pull it immediately, any high-rarity pistol with Crit stats or Anima bonuses serves as a strong F2P-friendly alternative. Arc Sets (Artifacts / Echoes) Primary 4-Piece Set: Look for Anima-focused sets that increase Basic Attack DMG and provide healing amplification (exact names will align with global beta data, focusing on those that boost elemental resonance). Secondary 2-Piece Set: Any set offering ATK% or Energy Recharge to fuel more frequent Ultimates. Stat Priorities (In Order) Crit Rate / Crit DMG (Aim for a 1:2 ratio) Anima DMG Bonus ATK% Energy Recharge (For frequent Ultimate uptime and bullet sustain) Break Effect (To capitalize on her Skill's Break reduction) Best Teams for Jiuyuan: Synergies That Maximize Her Hybrid Role Jiuyuan's role compression makes her a flexible sub-DPS and support pick. Here are the top Jiuyuan team compositions proven effective for optimal performance: Team SetupRolesWhy It WorksPlaystyle FocusNanally + Zero + Jiuyuan + SakiriMain DPS / Sub-DPS / Sub-DPS / SupportFast Genesis Reactions with Zero create explosive buds that Jiuyuan's crowd control and healing amplify; Sakiri adds Covering Pattern buffs.High AoE clear with chain reactions for mobs and bosses.Chiz + Hathor + Zero + JiuyuanMain DPS / Sub-DPS / Battery / Hybrid SupportChiz's Grain output pairs with Jiuyuan's Break reduction and healing; Hathor recharges energy while Jiuyuan handles control.Sustained DPS with strong survivability.Premium Balanced (Flex)Jiuyuan as core hybridAny Anima or Cosmos carry + an energy support.Safe ranged play with self-sustain. For more insights on pairing her with launch powerhouses, check out our companion Neverness to Everness Nanally Build Guide or the full NTE tier list available on the Enjoygm blog. Ascension, Leveling Tips, and Advanced Gameplay Advice Prioritize leveling Jiuyuan to 80/90 first, then focus on refining her signature Arc. Farm Anima-related boss materials and general ascension resources early, as her hybrid nature rewards consistent investment. Combat Rotation:Always lead with Basic Attack chains to stack Rose Pact Bullets. Then, layer Skill and Intel Hunter for control and debuff application before unleashing your Ultimate during boss vulnerability windows. Pro Tip: Utilize Jiuyuan's airborne plunge and dash mobility to reposition safely while maintaining optimal DPS uptime. In the global version, her healing scales well enough that you can confidently run aggressive team compositions without a dedicated healer slot. Why Jiuyuan Is Worth Building in Neverness to Everness From story progression to endgame challenges, Jiuyuan delivers a safe, stylish, and effective gameplay experience that rewards skillful positioning and precise bullet management. The true value of this NTE Jiuyuan guide lies in understanding how she compresses multiple roles—DPS, crowd control, and healing—without feeling diluted in any single area. For players seeking a single character capable of handling multiple responsibilities, Jiuyuan is an exceptional choice. Conclusion That concludes our Neverness to Everness Jiuyuan build guide. Ready to make Jiuyuan your main? Start building her today and watch her Lethal Rose Pact light up the battlefield.

  • Neverness to Everness Baicang Build Guide

    Hey NTE players! If you're ready to turn Baicang into your go-to hypercarry, you've come to the right place. This comprehensive Neverness to Everness Baicang build guide breaks down everything you need to know: his full kit, optimal playstyle, gear choices, team synergies, and advanced strategies. Master his unique HP-risk mechanics, and you'll be unleashing devastating single-target damage in no time. Let's dive in. ContentsNeverness to Everness Baicang – OverviewUnderstanding Baicang’s Playstyle in Neverness to EvernessFull Skills Breakdown for Neverness to Everness Baicang BuildBest Arcs and Signature Weapon RecommendationsConsole Sets and Stat PrioritiesBest Team Compositions for BaicangConclusion Neverness to Everness Baicang – Overview Baicang stands out as an S-Rank Incantation Synthesis DPS who excels as a dedicated boss executioner. His kit revolves around stacking Power Words—Bless, Silence, and Objurgate—that transform his ultimate domain into a versatile damage engine. While he demands precise timing and careful HP management, the payoff is massive sustained and burst damage that rivals top-tier carries in single-target scenarios. He’s not the easiest character to pilot, but once you master his rhythm, Baicang becomes a reliable powerhouse for challenging raids and story bosses. Understanding Baicang’s Playstyle in Neverness to Everness Baicang blends fluid martial arts combos with ranged incantation commands, creating a hybrid flow that rewards aggressive positioning and well-timed dodges. His core gameplay loop involves: Building Bless stacks through basic attacks (which drain his own HP to empower the team). Layering Power Words onto enemies. Detonating those words inside his Judgment of Autumn ultimate for amplified effects. Each Power Word serves a distinct purpose within the domain: Bless: Restores HP and focuses on single-target damage. Silence: Boosts single-target burst damage. Objurgate: Spreads AoE damage. He also passively applies Scorch (a powerful DoT) and gains extra stacks against already-affected foes, turning prolonged fights into inevitable burn-downs. You should expect to spend time intentionally below 50% HP, as Baicang's mechanics reward this risk with stronger effects and enhanced self-sustain during burst phases. This high-skill ceiling makes for a truly rewarding Neverness to Everness Baicang build, perfect for players who crave mechanical depth over simple button-mashing. Full Skills Breakdown for Neverness to Everness Baicang Build Mastering Baicang begins with a deep understanding of his kit. Here’s how every ability functions in the global version: Walk the Talk (Basic Attack): Performs up to 5 martial hits dealing Incantation DMG. Every 3 hits generate a Power Word: Bless on the target (up to 3 stacks). Each Bless application costs 3% of current HP, a cost that is halved when Baicang is below 50% HP. Formless Words / Unrestrained Words (Charged Basic): Hold after specific hits or during dodge windows to fire horizontal or vertical command bursts that detonate for AoE Incantation DMG. In the Wind (Plunge): Leap and strike downward, with damage scaling based on fall height. Truth Exposed (Critical Riposte): Executes a counterattack after a perfect dodge, applying a Bless stack and reducing the enemy's Break gauge. Generous Guidance (Skill): His core damage tool with three variants: ley line convergence, single-target Silence application after a dodge, or AoE Objurgate after charged basics. Judgment of Autumn (Ultimate): Deploys a domain that deals time-based Incantation DMG. Instantly executes targets below 10% HP (normal enemies) or 5% HP (bosses). Power Words inside the domain trigger unique bonuses: Silence for focused burst, Objurgate for AoE, and Bless for self-healing and single-target strikes. Grants temporary immunity to fatal damage. Break Time Over (Support Skill): A quick-charge AoE attack that applies random Power Words. Passive – Moderate Mischief: Generates an extra Scorch stack when a Power Word is generated on a target already affected by Scorch. ETD-4 Squad Synergies:Baicang's support interactions shine brightest with his ETD-4 squadmates: Skia (Stealth): Swapping triggers instant attacks and applies Silence. Fadia (Low-HP): Triggers emergency heals and coordinated attacks. Lacrimosa (Bat Form): Enables super jumps for repositioning. Best Arcs and Signature Weapon Recommendations Baicang’s Arc (weapon) should directly synergize with his HP-drain playstyle and Incantation focus. For an optimal Neverness to Everness Baicang build, prioritize Synthesis-compatible Arcs that grant Crit DMG upon HP loss or boost domain uptime. His signature 5-star Arc excels by converting self-inflicted damage into massive Crit DMG multipliers without requiring hits from enemies—this is invaluable for safely maintaining Bless stacks. Arc Options: Early Game: Any free or standard Synthesis Arc with Incantation DMG or ATK% substats. Endgame: Aim for the limited banner Arc that amplifies Power Word triggers. Since the Arc banner uses Tri-Key currency and is separate from character banners with generous pity, it's a worthwhile investment. Console Sets and Stat Priorities Consoles function similarly to artifact sets, featuring geometric "Tetris-piece" modules that unlock bonuses when shapes align. For Baicang, focus on sets that boost Crit Rate and Incantation DMG. 4-piece configurations emphasizing Type III pieces provide solid Crit Rate per piece, stacking nicely with his A6 awakening bonus. Stat Priority (Main Stats → Substats) SlotPriorityTarget Value GoalWeapon (Arc)Incantation DMG / Crit DMGMax DMG multiplierConsole 1-2Crit Rate / Crit DMG60-70% Crit Rate baseConsole 3-4ATK% / Incantation DMG Bonus40%+ Incantation focusSubstatsCrit DMG > Crit Rate > ATK% > HP%Balance for sustain Aim for double Crit rolls on key pieces and full Incantation synergy. Farm consoles through domain runs and module crafting; higher-tier shapes unlock significantly stronger set effects. Awakening Priority and Resonance Invest duplicates wisely by following this awakening priority order: A2 Soul Caller: Massive ATK stacking per Power Word (core damage amplification). A6 White Aspect: Grants 30% Crit Rate during Ultimate (huge burst window enhancement). A1 Yo, Captain!: Increases Skill DMG and reduces cooldown on triggers. A3 Curses Spoken Into Being: Grants an extra Power Word slot. A4 / A5: Improve sustain and domain duration. Achieving full 6-awakening Resonance grants team-wide ATK bonuses and execution capabilities inside the domain—a game-changing advantage for coordinated raids. Best Team Compositions for Baicang Baicang excels in Incantation-heavy teams that trigger Scorch reactions and leverage ETD-4 synergies. Here are strong setups for an effective Neverness to Everness Baicang build: ETD-4 Core (Recommended for Maximum Synergy): Baicang (Main DPS) + Lacrimosa (Sub-DPS/Bat form mobility) + Skia (Stealth swaps) + Fadia (Low-HP emergency triggers). This squad maximizes support skill procs and keeps the domain rolling smoothly. Reaction-Focused: Baicang + Chaos/Psyche supports to chain Scorch → Nova → Discord reactions. Budget-Friendly: Baicang + free standard selector options like Adler for easy battery and sustain. For detailed builds on complementary teammates, check out our Neverness to Everness Lacrimosa Build Guide or Neverness to Everness Sakiri Build Guide—both pair beautifully as flexible supports. Advanced Tips for a Neverness to Everness Baicang Build HP Management: Rotate basics to generate Bless stacks safely. Intentionally drop below 50% HP to halve the drain cost, but remain vigilant against fatal hits while inside the Ultimate domain. Front-Load Damage: Use perfect dodges into Truth Exposed to quickly apply Bless stacks and reduce the enemy's Break gauge. Ultimate Timing: Save Judgment of Autumn for boss phases where the execution threshold truly shines; the domain duration is extended with A5 investment. Content Focus: Avoid using Baicang for mob-clearing stages. He is a dedicated single-target specialist. Pair him with strong AoE teammates for mixed-content challenges. Practice Makes Perfect: Spend time in the training arena until Power Word management feels second nature. Once the rhythm clicks, you'll be melting bosses faster than most meta teams. Conclusion So, are you ready to take your NTE Baicang build to the next level? Experiment with these strategies, refine your rotations using the guidance above, and watch Baicang become the captain who carries your entire account through the most demanding endgame content.

  • Neverness to Everness Haniel Build Guide

    In the neon-drenched streets of Hethereau City, where anomalies lurk just beneath the surface of everyday life, Haniel stands out as one of the most accessible and powerful support characters in Neverness to Everness (NTE). Unlocked for free as an A-Rank Psyche buffer via pre-registration milestones, Haniel excels at amplifying team damage through ATK buffs, controlling the battlefield with her signature speaker Hootie, and creating burst windows that elevate a good team into a great one. ContentsWho Is Haniel in Neverness to Everness?Haniel Skills and Kit BreakdownBest Haniel Build: Arcs, Stats, Gear & WeaponsOptimal Team Compositions for HanielRotation and Playstyle GuidePro Tips for Haniel BuildConclusion This comprehensive Neverness to Everness Haniel build guide covers everything you need to master her: from full skill breakdowns and optimized rotations to team synergies and stat priorities. Who Is Haniel in Neverness to Everness? Haniel is an energetic A-Rank Psyche character affiliated with Sterry Express, Hethereau’s premier delivery service. With her vibrant pink-and-green hair, oversized streetwear sweater, and gamer-inspired aesthetic, she brings equal parts personality and serious utility to any squad. Her primary role centers on DMG Boost support: Grants team-wide ATK bonuses that scale directly off her own Base ATK. Deploys Hootie for persistent area buffs and triggered attacks. Enters the powerful Paranormal Ace state during her Ultimate for significantly enhanced effects. As one of the easiest A-Rank characters to obtain (free at 30 million global pre-registrations), Haniel is a perfect fit for F2P players and early-game teams. In an optimal Neverness to Everness Haniel build, she functions as a flexible buffer who also contributes minor Psyche DMG and Break reduction, ensuring her viability from story progression all the way into endgame content. Haniel Skills and Kit Breakdown Understanding Haniel’s full kit is essential for maximizing her potential. Here’s exactly how her abilities function in the global version: Basic Attack: Genesse TechniqueFires magic projectiles in up to 5 consecutive hits, dealing Psyche DMG. Hold during the first hit to charge and unleash Paranormal Cannon (a powerful forward shot). While airborne, press the attack button to execute Paranormal Entrance, a plunging attack that deals up to 200% DMG based on fall height and hits in an area of effect. Critical Riposte: Ace SweepAfter performing a perfect dodge during Genesse Technique, immediately fire a fully charged Paranormal Cannon while reducing enemy Break. Skill: Silent Moonlit Forest GuardianThrows portable speaker Hootie, dealing AoE Psyche DMG. While active, Hootie grants the active team member an ATK bonus based on Haniel’s Base ATK. Each attack from the on-field character adds a stack of Four-Part Harmony (max 4 stacks, once every 0.5s). At 4 stacks, it triggers Ensemble, dealing extra Psyche DMG around Hootie. Only one Hootie can exist at a time; recasting refreshes its duration, and it persists even when swapping characters. Ultimate: A Melody Named Haniel"Genesse Girls' Academy Paranormal Department! Assuming control!"Unleashes a team-wide enhancement field and enters the Paranormal Ace state. This grants a significant ATK bonus to the entire team. While Ace is active, Ensemble triggers also produce a stronger Ensemble – Symphony effect with increased damage and range. Hootie's duration timer is paused during Ace state, and the active character’s next attack after an Ensemble trigger gains bonus damage for 3 seconds. QTE: Easter Egg TimeFires a magic projectile for a single instance of Psyche DMG. Excellent for weaving in extra damage during character swaps. Passives It’s Friendship! (Nova Enhancement): Drains a portion of enemy ATK at 200% efficiency and redistributes it as a team ATK buff when Nova ends (capped). It’s Bond!: Gains Plot Armor stacks on Ensemble triggers (more stacks are gained while in Ace state). Each stack increases Paranormal Cannon's ricochet limit (up to 5 stacks). These mechanics make Haniel a "set-it-and-forget-it" buffer who rewards smart positioning and timing. Her buffs are highly reliable and scale beautifully with investment in her Base ATK. Best Haniel Build: Arcs, Stats, Gear & Weapons For the optimal Neverness to Everness Haniel build, focus on maximizing her buff strength, uptime, and consistency rather than her personal DPS. Since her ATK bonuses scale directly off her Base ATK, prioritize stats that boost her own ATK% while ensuring she can cycle through her skills without interruption. Recommended Arc (Weapon) Priorities Primary Focus: Buff Enhancement. Look for Arcs with ATK% increases, Buff Amplification, Energy Regeneration, and Cooldown Reduction. These directly supercharge her team-wide bonuses and keep Hootie and her Ultimate active. Signature-Friendly Option: Camellia Society (Offers CRIT DMG stacks and a unique Arc skill for extra utility in prolonged fights). Strong Alternatives: Youthful Fantasy for Break synergy, or general A-tier options like Umbrella (stable energy) and Drawn Blade (skill-focused triggers). In the early game, any Solid Arc with ATK% or Energy Recharge works well. Stat Priorities (In Order) ATK% (Core for buff scaling) Energy Recharge / Cooldown Reduction (For faster rotations and Ace uptime) Psyche DMG Bonus (Boosts her personal contribution and Ensemble damage) Crit Rate / Crit DMG (Secondary stats for improving Ace state performance) Break Effect (Helpful for team synergy) Gear (Tetris Pieces / Modules / Console)Aim for 2-piece + 4-piece sets that boost Psyche DMG or provide team buffs. Substats should prioritize rolling double Crit, ATK%, and Energy Recharge whenever possible. Focus on farmable early sets at global launch before transitioning into premium modules. Awakening Priority (For Maximum Value) A1: More Paranormal Cannon ricochets. A6: Hootie cooldown reduction. A2: Longer Hootie duration. A3: Crit Chance in Ace state. A5: Psyche DMG in Ace state. A4: Bonus damage on next attack. Resonance upgrades further boost team Crit DMG while in Ace state—prioritize these as you progress. Optimal Team Compositions for Haniel Haniel thrives as the dedicated buffer in balanced squad setups. The core formula for any strong Haniel team composition in NTE is: Main DPS + Break/Sub-DPS + Haniel + Utility/Flex. Top Recommended Teams: Dual Burst Rotation (Best for Most Content): Pair Haniel with a high-damage main DPS (like Sakiri or Chiz) and a Break-focused sub-DPS. Haniel’s ATK buffs and Ensemble triggers fuel massive burst windows, while the utility slot covers crowd control or healing. Psyche-Focused Synergy: Teams featuring other Psyche characters benefit from shared attribute bonuses and easier Esper Cycle activation. Beginner-Friendly F2P Team: Haniel + a free/early DPS option + a solid Break character. This setup clears story quests, daily anomalies, and early endgame content with ease. Rotation and Playstyle Guide Mastering Haniel’s rotation is straightforward once you internalize the flow: Swap to Haniel → Deploy Skill (Hootie) to initiate buffs and begin stacking Four-Part Harmony. Build Plot Armor via Ensemble triggers while contributing Basic Attacks or Cannon shots. Activate Ultimate when energy is full to enter Paranormal Ace for the significant team ATK spike and enhanced Ensembles. Swap out to your main DPS and let the buffs carry the fight—Hootie continues working off-field. Use QTE on swaps for extra damage and reposition as needed. Playstyle Tip: Position Hootie centrally in the arena for maximum coverage. Avoid enemies with heavy animation-locking attacks during her skill casts, as her buff deployment can be interrupted in chaotic scenarios. With effective energy management, you can maintain near-permanent uptime on her buffs and Ace state. Pro Tips for Haniel Build Pre-Reg Reward: Haniel is awarded for free via pre-registration milestones, so there is no need to pull for her unless you specifically want duplicates for Resonance. Farming Priority: Focus early resource farming on materials that boost Base ATK and Energy Recharge to ensure she scales smoothly into the mid-game. Exploration: While her Life Skill offers minor economic perks in the overworld, her true value shines in combat. Future Updates: Global launch on April 29 may introduce minor balance tweaks, but her core role as a premier buffer is expected to remain strong. Conclusion With this Neverness to Everness Haniel build guide, you have the blueprint to transform your free A-Rank support into a meta-defining buffer capable of carrying teams through every anomaly Hethereau City has to offer. Invest in her wisely, and watch your squad's damage soar.

  • Arknights: Endfield v1.2 “At the Wake of Spring” arrives April 17 with new Operators, regions, and systems.

    GRYPHLINE has revealed a major free update for Arknights: Endfield titled At the Wake of Spring, set to launch on April 17, 2026. This version 1.2 update continues the Wuling storyline and brings new game content, Operator, industrial systems, regions, events, and more. So, let’s dive into the details! <memubtn game_id=85138&ext=20260414></memubtn> Contents Arknights: Endfield update brings new story developments and the first battle against Nefarith Arknights: Endfield Version 1.2 update: New Operator and new regions Arknights: Endfield Version 1.2 update: New mission scenes, gear sets, and collectible content Events, headhunting, and arsenal issues Wuling AIC Plan update Arknights: Endfield update brings new story developments and the first battle against Nefarith So, this upcoming update continues the escalating tension in Wuling, starting with an emergency report from the new character Zhuang Fangyi involving Ardashir’s sudden appearance near the new Marker Stone facility. And as things spiral further, you’ll be pushed into a direct confrontation with Nefarith for the very first time, and this kind of excites me. Arknights: Endfield Version 1.2 update: New Operator and new regions 1. Arknights: Endfield New Operator: Zhuang Fangyi New Operator Zhuang Fangyi in Arknights: Endfield (Image via GRYPHLINE) Zhuang Fangyi, the new 6-Star Operator, is an Electric-based striker with very high damage output. You can consume Electrification with her battle skill to continuously generate Sunderblades and then strike enemies with thunder. And her ultimate ability significantly enhances your combat performance. 2. Arknights: Endfield New Region: Marker Stone So, Marker Stone is one of the key facilities central to Wuling’s stability and also to suppress the very large rift in the storyline. Here, you’ll find ever-changing spaces and complex pathways, in addition to the obstacles set by Adashir. 3. Arknights: Endfield New Region: Test Area Test Area is another new region that is opening later in the update cycle. Overall, this update brings post-disaster restoration, puzzle-solving, and deeper regional exploration. Arknights: Endfield Version 1.2 update: New mission scenes, gear sets, and collectible content The update also brings a wide variety of missions, gear, and more, and they are as follows: Arknights: Endfield New Ornamentals (Image via GRYPHLINE) New Mission Scenes Wuling Underground Array mission scene. Attacked Main Pillar Office mission scenario. Gear Updates Bonekrusha, Frontiers, and Swordmancer Gear Packs. New Gear Sets Qingbo and Xiranflow Gear Packs New Item Ornamentals: Tube Professor, Miniature Tree on a Hill, and Chubby Lung Bollard. Events, headhunting, and arsenal issues And what exactly is an update without events and recruitment banners, right? Well, don’t worry, as Arknights: Endfield is bringing a lot of them for you. Arknights: Endfield Thunder of Renewal Headhunting (Image via GRYPHLINE) Headhunting Charter Headhunting – Thunder of Renewal. Special Headhunting – Fest of Brilliance. Arsenal Issues Drifiting Raft Issue, Smelting Fire Issue, and Swift Walker Issue. Here are the upcoming events: Etchings of Our Cosmic Dreams Event in Arknights: Endfield (Image via GRYPHLINE) Subduer of the Blighted Sea – In this guide event, you can complete missions like unlocking TP Points in the Marker Stone region to earn various rewards. Curious Use of Xiranite – In this guide event, you can complete missions like unlocking TP Points in the Test Area region to earn various rewards. Etchings of Our Cosmic Dreams – This Space Exploration Event begins on April 24, 2026. AIC Support: Palm-Top Savior – This AIC Production Event begins on April 28, 2026. Supply: Wuling Super Chef – Supply event. Wuling AIC Plan update You can look forward to the following Industrial System content: Arknights: Endfield Wuling AIC Plan (Image via GRYPHLINE) New fluid type: Precipitation Acid. New production formulas for Wuling AIC III systems. Various new AIC facilities like the Acid Resistant Pump Mk II and Expanded Crucible. Overall, the upcoming update of Arknights: Endfield looks pretty content-heavy to me, as it introduces new story content, more map and exploration content in Wuling, and deep industrial gameplay with a new outpost, new resources, and new production options. On top of that, the events look fun, and the permanent gameplay updates and improvements are also welcome.

  • Neverness to Everness Edgar Build Guide

    Here's a refined and polished version of the Edgar guide, with improved clarity, grammar, and flow while preserving all game-specific terminology and strategic details. Welcome to the Neverness to Everness Edgar Build Guide—your complete resource for mastering Edgar's healing potential. In this guide, we'll cover everything you need to know about Edgar, including his skills, best Arcs, stat priorities, optimal team compositions, and pro gameplay tips. Whether you're a newcomer or an endgame veteran, this guide will help you build Edgar into a powerful pure healer capable of sustaining your team through the toughest battles. Neverness to Everness Edgar Overview AttributeDetailsRarityA-RankEsper TypeCosmosArc TypeLiquidRolePure Healer / SupportGenderMale Edgar is an A-Rank Cosmos character with Liquid Arc abilities. In the storyline, he is a member of the Eibon Antique Shop—a calm, blue-haired young man who thinks deeply and applies "game rules" to real-life situations, shaping his uniquely analytical support style. In combat, Edgar fills a dedicated, supportive role with robust healing capabilities. His kit focuses on consistent, sustained healing to keep the entire party alive. His skills revolve around channeling direct heals and deploying a healing field with his Ultimate, which continuously restores HP to the active character. As a pure healer, he offers minimal buffs or extra utility, but his raw sustain output makes him an excellent choice for overcoming challenging encounters. Edgar's Skills Breakdown Understanding Edgar's abilities is essential before assembling the optimal Neverness to Everness Edgar build. His kit emphasizes basic Cosmos damage, targeted healing, domain-based team sustains, and passive stack generation for extended Ultimate uptime. Active Skills Skill Type Description Combat Practice Basic Attack Performs up to 5 consecutive attacks, dealing Cosmos DMG. Calculated Landing Plunge Attack Plunges from mid-air to deal AoE Cosmos DMG. Damage scales with fall height (up to 200%). Crisis is Opportunity Critical Riposte After a Perfect Dodge, rushes forward to deal AoE Cosmos DMG and reduce enemy Break. Wild Current Redirect Skill Hold to deal continuous Cosmos DMG while simultaneously healing the lowest-HP teammate. The longer the channel, the longer the resulting cooldown. Finnegan's Wake Ultimate Creates a labyrinth-like domain for 10 seconds. Deals one instance of AoE Cosmos DMG upon activation and continuously heals the active character for its duration. Weight of Knowledge Support Skill Charges toward the target and swings his heavy bag, dealing a single hit of AoE Cosmos DMG. Passive Skills PassiveEffectGentle Edge (Charge Enhancement)When any character triggers Charge using a Support Skill, Edgar instantly gains 120 Ultimate Energy. This effect can occur once every 30 seconds and temporarily disables certain other energy gains.Unchanging WarmthUsing Wild Current or Weight of Knowledge grants 1 stack of Key of Truth (max 3 stacks). Each stack extends the duration of Finnegan's Wake by 1 second. Life Skills (Knowledge in Action) LevelEffect01Increases traffic by 18.02Reduces ingredient usage rate by 1%.03Customers are more likely to select the most expensive dishes.04Reduces ingredient usage rate by an additional 1%.05Increases traffic by 27. Skill Upgrade Priority Focus your upgrade materials in this order for maximum healing efficiency: Wild Current (Highest Priority): Edgar's primary healing skill. Upgrading it directly improves his ability to sustain the lowest-HP teammate. Finnegan's Wake (Ultimate): Increases healing potency and extends domain duration for superior team survivability. Weight of Knowledge (Support Skill): Helps generate Keys of Truth faster, enabling more frequent and longer Ultimate usage. Basic Attack (Lowest Priority): Contributes minimal value to his support role; upgrade this last. Edgar's Awakenings and Resonances Awakenings Edgar's Awakenings are unlocked through duplicates and enhance his healing output, Ultimate uptime, and team durability. Awakening Effect A1: Anomaly-Loving Observer Gains 1 Key of Truth whenever any teammate uses a Support Skill. A2: Intern Anomaly Hunter Limits the maximum cooldown extension of Wild Current (minor utility). A3: One of the Eibon Detectives Increases Wild Current healing by 15% for allies below 80% HP. A4: Skilled Strategist Increases Wild Current DMG by 50% (low priority for healer builds). A5: Guardian of the Antique Shop's Light Increases Edgar's Max HP by 20%. A6: Visitor from Planet Curiosity Grants 15% DEF to all allies standing inside Finnegan's Wake. Awakening Priority: A3 > A1 > A6 > A5 >> A2 > A4 Resonances Resonances activate at specific Awakening thresholds to further empower his abilities. Resonance Requirement Effect Pursuit of Knowledge 3 Awakenings Increases the skill level of Wild Current, Finnegan's Wake, and Weight of Knowledge by 1. Keen Insight 6 Awakenings Converts 3% of any teammate's lost Max HP into 1 Charge for Finnegan's Vigil (up to 20 charges; resets upon casting Ultimate). Best Arcs for Edgar Edgar is a Liquid-type character, so Liquid-aligned Arcs provide the greatest synergy. Prioritize Arcs that boost HP%, Healing Bonus, and Ultimate uptime by improving Key of Truth generation or extending domain duration. Arc Recommendation Effect / Best Use Case Eternal Ledger Signature (Best-in-Slot) Increases Healing Bonus and HP%, and extends Finnegan's Wake duration based on Keys of Truth. Maximizes both healing output and team sustain. Guardian's Pocket Watch Strong Alternative Boosts HP% and provides small shields when using Wild Current. Enhances survivability and on-field presence. Ideal for beginners or sustain-focused builds. Antique Scholar's Bag Alternative Increases DEF% and reduces damage taken by allies inside the Ultimate domain. Suited for tougher encounters requiring extra durability. Lamplight Quill Budget Option Provides HP% and minor energy assistance for faster Key generation. A solid early-game choice when premium Arcs are unavailable. Edgar's Stat Priorities Edgar is a pure healer focused on keeping allies alive through extended, durable engagements. Prioritize HP and Healing Amplification to ensure he can remain on the field and deliver consistent sustain. Stat Priority & Explanation HP% Highest Priority. Scales both his healing potency and personal survivability. Healing Bonus Essential. Directly amplifies healing from Wild Current and Finnegan's Wake. DEF% Medium Priority. Increases Edgar's durability and reduces the likelihood of interruption while channeling. Energy Recharge / Ultimate Charge Medium Priority. Helps deploy Finnegan's Wake more frequently for improved team sustain. Cosmos DMG Low Priority. Offers marginal damage increases but is not relevant for a dedicated healer build. Best Team Compositions As a pure healer, Edgar excels in teams that require additional sustain and survivability—particularly against challenging bosses or high-pressure content. He fits seamlessly into nearly any squad lacking strong healing, providing consistent restoration through both targeted skills and his Ultimate domain. Team 1: Edgar Early Game Team Perfect for story progression and early quests. Combines strong healing with balanced damage to handle difficult early-game encounters. Character Role & Synergy with Edgar Nanally Main DPS. Delivers high burst and follow-up damage while staying safe under Edgar's healing. Adler Sub-DPS. Provides shields and damage-over-time effects while Edgar sustains the party. Edgar Healer/Support. Anchors the team with consistent healing and domain sustain. Zero Support. Offers energy regeneration and buffs for smoother rotations. Team 2: Double Sustain Boss Team Ideal for tough single-target boss fights or high-difficulty content where maximum survivability is required. Character Role & Synergy with Edgar Baicang Main DPS. High single-target burst damage; can stay on-field longer thanks to Edgar's healing. Jiuyuan Sub-DPS. Contributes ranged damage and utility support. Fadia Healer/Tank. Boosts team HP, provides shields, and adds a second layer of healing for unparalleled durability. Edgar Secondary Healer. Supplies additional domain healing to ensure the team never falls. Team 3: Best Early Farming Team Excellent for exploration, material farming, and swiftly clearing waves of enemies while Edgar's healing keeps the team safe. Character Role & Synergy with Edgar Sakiri Main DPS. Strong AoE damage and grouping abilities that pair naturally with Edgar's area healing. Hathor Sub-DPS. Provides energy support and follow-up attacks. Skia Sub-DPS/Support. Offers crowd control and extra utility for efficient mob clearing. Edgar Healer/Support. Maintains team health with domain healing throughout wave-based fights. Pro Tips & Tricks for Playing Edgar Follow these strategies to optimize your gameplay with the best Neverness to Everness Edgar build: Healing Ability Flow: Use Wild Current to focus healing on the lowest-HP teammate while dealing minor Cosmos DMG. Be mindful of the channel duration, as longer channels increase the cooldown. Ultimate Timing: Generate Keys of Truth using Wild Current and Weight of Knowledge to extend Finnegan's Wake. Activate the domain during phases of heavy incoming damage to maximize healing value and team survivability. Positioning: Maintain a mid-range position near your allies. Use Weight of Knowledge for quick engagements or to build stacks while staying relatively safe. General Mindset: Edgar is straightforward and beginner-friendly, but he rewards good timing with channeling and strategic domain placement. Mastering when to hold Wild Current and when to drop Finnegan's Wake will dramatically improve your team's consistency. Conclusion This concludes our Neverness to Everness Edgar Build Guide. With the right Arcs, stat priorities, team compositions, and careful timing, Edgar becomes a formidable pure healer capable of ensuring your team's survival through all types of content. Follow this guide to optimize his healing output, maximize Ultimate uptime, and build reliable teams ready to conquer both early-game challenges and endgame battles.

  • Neverness to Everness Hotori Build Guide

    Here's a refined and polished version of the Hotori guide, with improved grammar, smoother flow, and a more professional yet accessible tone while preserving all gameplay mechanics and terminology. Hello, players! If you've just pulled Hotori for your Neverness to Everness roster and want to build her the right way, you've come to the perfect place. This Neverness to Everness Hotori Build Guide covers everything you need: the best Arcs, stat priorities, skill upgrade order, and optimal team compositions. So don't wait—follow this guide to unlock Hotori's full potential. 
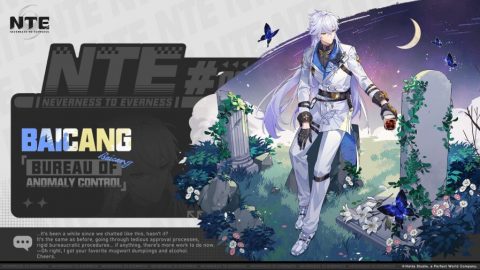
Who Is Hotori in Neverness to Everness? Hotori is an S-Rank Cosmos element character in Neverness to Everness (NTE). She primarily functions as a team support and healer, blending burst utility with time-manipulation mechanics. Her kit allows her to keep allies alive while significantly boosting their damage during critical battle windows. On the battlefield, Hotori's identity revolves around the Non-Closed Timepiece: a unique gauge that slowly accumulates energy while she is active. This energy enables her to record and replay skills, provide continuous healing, and even slow or stop time with her Ultimate. These effects create safe windows for her team to unload devastating burst damage. In short, Hotori is a top-tier support who amplifies team damage by echoing ally skills, sustains the party through healing, and controls the tempo of combat. Hotori's Skills Breakdown Mastering Hotori's skills is essential for maximizing her impact. Her kit is built around charging the Timepiece, recording actions, healing, and delivering burst damage. Here's how each ability functions in this Neverness to Everness Hotori build guide. Basic Skills Skill Type Description Misty Moon Style Basic Attack Performs up to 5 consecutive umbrella-katana strikes, dealing Cosmos DMG. This is her primary damage source during Time Stop. Rippling Waves Hold Basic Attack Dashes forward and strikes enemies 4 times with AoE Cosmos DMG. Excellent for mobility, closing gaps, or hitting grouped enemies. Crescent Plunge Attack Mid-air plunge dealing AoE Cosmos DMG. Damage scales with fall height. Non-Closed Timepiece Core Mechanic Activates upon entering the field. The Timepiece slowly spins, generating energy up to a maximum of 120 over time. Half Moment Critical Riposte Triggered after a Perfect Dodge during basic attacks. Counters with umbrella strikes, dealing Cosmos DMG and reducing enemy Break. A strong defensive tool. Present Replay Skill No cooldown. Consumes 60 Timepiece energy to deal AoE damage and record ally Support/Redirect skills for 5 seconds (up to 3 records). The Timepiece rewinds during use, and recorded actions are replayed later. New recordings overwrite old ones. Ultimate Skill Type Description World's Tide Ultimate Can only be activated when the Non-Closed Timepiece is fully charged. Deals massive AoE damage, replays all recorded attacks, builds combo stacks for escalating damage, and ends with a powerful finisher. Notably, this Ultimate has no cooldown and no energy cost beyond the Timepiece charge. Support & Passive Skills Skill Type Description Shopkeeper's Authority Support Skill Throws her umbrella for a single instance of AoE Cosmos DMG. A quick, low-cooldown ranged tool for poking or finishing off enemies. Ghost Orchid Crest Blossom Passive During Time Stop, attacks continue without consuming additional resources. This allows Hotori and her team to deal damage freely while time is frozen, massively amplifying the effectiveness of World's Tide. Skill Upgrade Priority Focus your resources in this order for maximum impact: World's Tide (Highest Priority): Provides the biggest power spike and is her primary source of burst amplification. Present Replay: Enhances recording effects and overall damage contribution. Misty Moon Style: Strengthens her combo attacks during Time Stop windows. Basic Attack & Support Skill: Upgrade these last, as they offer the least return compared to her core abilities. Hotori's Awakenings and Resonances AwakeningsHotori's Awakenings improve her sustain, Time Stop damage, energy economy, and team utility. These are unlocked via duplicates and can be toggled freely. Awakening Effect A1 Increases damage by +12% during Time Stop per recorded Support/Redirect skill. A2 Increases Hotori's damage by +20% during Time Stop. A3 Restores Present Replay energy after recording (once every 60s). A4 Gains +10 Timepiece energy per enemy defeated (up to 3 stacks). Resets upon using World's Tide. A5 Increases team damage against single-target enemies by +15%. A6 Ignores 30% of enemy DEF during Time Stop. ResonancesThese bonuses activate at specific Awakening thresholds. Resonance Requirement Effect Eternity Shattered 3 Awakenings Increases skill level of Misty Moon Style, Present Replay, and World's Tide by 1. The Ultimate Treasure of Clear Understanding 6 Awakenings Grants the entire team +10% ATK while Hotori is in the party and alive. Best Arcs for Hotori Hotori is a Solid-type character, so prioritizing matching Solid-type Arcs yields the greatest value. She excels with Arcs that accelerate Timepiece charging, boost team buffs during Time Stop, increase Cosmos DMG, or improve healing output. Arc Recommendation Effect / Best Use Case Timeless Umbrella Signature (Best-in-Slot) Boosts energy recharge, Cosmos DMG during World's Tide, and team ATK buffs during Time Stop. The optimal choice for maximizing Hotori's potential. Eternal Pocket Watch Strong Alternative Increases Timepiece energy gain and HP%, and slightly extends Time Stop duration. Great for sustain and consistent Ultimate uptime. Antique Katana Alternative Increases HP and provides small shields. Improves survivability and supports healing output. Good for beginners or a tankier playstyle. Misty Relic Blade Early-Game Alternative Boosts Break effect and adds a small amount of Cosmos DMG. A solid option for extra Break support in the early game. Hotori's Stat Priorities Focusing on the right stats is crucial for an optimized Neverness to Everness Hotori build. Prioritize Energy Recharge for faster Timepiece cycling and HP for enhanced durability and healing. Stat Priority & Explanation Energy Recharge / Timepiece Speed Main Focus. Fills the Non-Closed Timepiece faster, allowing more frequent use of World's Tide. HP% High Priority. Improves team healing potency and increases Hotori's personal survivability. Cosmos DMG Medium Priority. Increases damage across all skills, including Time Stop combos and replays. ATK% Medium Priority. Boosts Hotori's personal damage and any ATK-scaling team buffs. Crit Rate / Crit DMG Low Priority. Improves burst damage during Time Stop, but falls behind Recharge and HP in overall value for her support role. Best Team Compositions Hotori is a powerful support who provides consistent healing via her Timepiece and amplifies team damage. She thrives in compositions that maximize Blossom uptime and Cosmos synergy. Pair her with Blossom-focused or Cosmos DPS units to get the most out of her kit. Team 1: Hathor Premium Blossom TeamA top-tier composition leveraging high Blossom uptime, strong healing, and devastating burst damage. Character Role & Synergy with Hotori Hathor Main DPS. Benefits immensely from Hotori's burst windows and healing support. Hotori Support. Provides healing and boosts Blossom uptime to amplify Hathor's damage. Nanally Blossom Unit. Adds extra Blossom effects and follow-up attacks that become even more potent during Time Stop. Fadia Healer/Tank. Increases team HP and provides additional healing, ensuring long-term stability. Team 2: Nanally Blossom/Genesis TeamA more accessible team focused on smooth Blossom and Charge reactions while maintaining strong Hotori uptime. Character Role & Synergy with Hotori Nanally Main DPS. Deals strong Blossom and burst damage, further amplified by Hotori's support. Hotori Support. Sustains the team and improves Blossom uptime for consistent damage output. Fadia Healer/Tank. Boosts HP and provides healing for longer, more stable encounters. Sakiri Sub-DPS/Support. Contributes AoE damage and reaction boosts, synergizing well with Hotori's sustain. Pro Tips & Tricks for Playing Hotori Use these strategies to elevate your Hotori gameplay: Recording Strategy: Use Present Replay to copy high-value ally skills—prioritize buffs or heavy-hitting sub-DPS abilities—within the 5-second window. Records reset upon entering or leaving combat, so plan accordingly. Time Stop Mastery: Activate World's Tide only when the Timepiece is fully charged. During the Time Stop window, use katana combos to build stacks quickly; a 10-stack finisher deals maximum damage. Optimal Combo Flow: Build Timepiece energy → Record key ally skills → Activate World's Tide → Allow replay damage to unload → Finish with a full katana combo. Positioning: Use her umbrella throw (Shopkeeper's Authority) for quick, safe AoE poke. Maintain a mid-range position to react to enemy attacks and trigger Half Moment ripostes. General Mindset: Hotori is easy to pick up but rewards precise timing. The better you manage her recording windows and Time Stop activations, the higher your team's overall damage and survivability will climb. Conclusion That covers everything you need for the definitive Neverness to Everness Hotori build. Equipped with the best Arcs, proper stat priorities, and optimal team compositions, you can easily integrate her into your squads as a top-tier support. Follow these tips to refine your gameplay and lead your team to victory with Hotori at the helm.

  • Neverness to Everness Chiz Build Guid

    Hey, Anomaly Hunter! If you've got Chiz, this Neverness to Everness Chiz build guide is exactly what you need. Chiz is a Cosmos DPS who revolves around generating and spending a unique resource called Grain to unleash devastating damage. While she requires a bit of rhythm to master, she becomes an absolute powerhouse—especially in boss encounters. She's both fun and accessible, making her a fantastic pick for newcomers and veterans alike. In this guide, we'll break down her skills, optimal builds, best teams, and rotation tips to help you dominate the battlefield. Why Play Chiz? Core Playstyle Overview Chiz is currently rated B-tier in the Neverness to Everness Tier List, but don't let that fool you—her lower rarity makes her easy to obtain, and her unique Grain trading system gives her a high skill ceiling that feels incredibly rewarding. Here’s the core loop of how Chiz operates: 1. Grain Generation & SpendingChiz’s kit revolves around accumulating Grain via Basic Attacks and Skills. You then "cash in" this resource using her Redirect skill and Ultimate to deal massive Cosmos damage. Think of it like building up financial interest before making a huge withdrawal. Mastering the timing of this spend cycle is crucial; managing it correctly allows you to melt boss HP bars in seconds. 2. High Single-Target DamageChiz isn't the fastest at clearing waves of trash mobs, but she truly shines in 1v1 scenarios. Her combination of Redirect chains and her Ultimate's burst phase makes her a premier boss killer. Focusing her rotations on single targets will yield the highest damage returns. 3. Rhythm-Based CombosPlaying Chiz isn't mindless button-mashing; it rewards precision and timing. Tapping her Redirect skill cycles through distinct phases (No Grain → Half Grain → Full Grain). Finding the rhythm to maximize these taps—or knowing when to hold for a risky, high-reward burn—makes her gameplay feel like a satisfying rhythm game. 4. Resource Management is KeyKnowing when to save and when to spend defines a great Chiz player. Blowing all your Grain too early leaves you vulnerable with no damage output, but hoarding it forever wastes potential burst windows. Smart Grain economy separates the average players from the pros. Neverness to Everness Chiz Build: Skill Breakdown Understanding Chiz's skills is essential for generating Grain efficiently and controlling the flow of combat. Each ability serves a distinct purpose, from building resources to executing burst damage. Skill Type Function & Strategy Exiled Swordplay Basic Attack Performs up to 5 rapid staff strikes. This is your primary Grain generator. Fast and spammable, use it to build resources at the start of any engagement. Barren Hold / Basic Tosses Brown Sugar Boba for 2 hits of Cosmos damage. Generates both Grain and Fons. Holding the button mid-combo triggers a branching attack. Great for sustained resource farming. Bountiful Grain Plunge Attack Leap and slam the ground for AoE Cosmos damage. Damage scales with fall height and grants Grain on hit. Useful for repositioning or adding extra burst to grouped enemies. Critical Riposte – Minsky Moment Perfect Dodge Follow-up Triggered after a Perfect Dodge. A swift leap attack dealing Break damage and generating Grain. This is a free damage window—always punish enemy attacks with this to maintain momentum. Pink Paws Priority Principle Redirect Skill (Core) The bread and butter. Up to 3 charges. Tap to cycle through: No Grain → Half Grain → Full Grain. Each press consumes Grain for damage. Hold the skill to continuously burn Grain for sustained high DPS. Mastering the tap sequence and hold timing maximizes her damage ceiling. Ultimate – Zero-Sum Game Ultimate Unleashes a massive AoE Cosmos nuke and activates Grain Market Mode for 7 seconds. During this mode, your Grain is "invested" to generate huge bonus burst damage. It even functions while in "Debt," making it perfect for crucial boss phases. Support & Life Skills Passive Hanahaki Disease: Grants allies additional Charge.Hoarding: Increases team efficiency while locking resources.Life Skills provide passive Fons income and efficiency bonuses. Best Build for Chiz A build combines Module sets, Main Stats, Substats, and Awakening upgrades to optimize a character's performance. For Chiz, the goal is to amplify Cosmos Damage, improve Critical consistency, and streamline Grain efficiency. How to Build Chiz: Modules: Function as her equipment/artifacts, providing damage bonuses and penetration. Main Stats: The core percentages on gear that scale damage. Crit Rate, Crit DMG, and Cosmos DMG are top priority. Substats: These fine-tune her power with extra ATK%, Crit, or resource efficiency, ensuring consistency in longer fights. Awakening Skills: Upgrades that enhance her Grain system and provide passive damage boosts. Recommended Build Setups Build Type Recommended Setup Core DPS (High Burst) Module Set: LOST RADIANCE (4-Piece)Main Stats: Crit Rate (Body), Cosmos DMG (Head)Substat Priority: Crit DMG > Crit Rate > ATK%Awakening: Aim for A2 to unlock Grain Interest. F2P / Beginner Friendly Module Set: LOST RADIANCE (2-Piece) + Filler ModulesMain Stats: Crit Rate / ATK%Substat Priority: Crit Rate > ATK% > Any Offensive StatAwakening: Focus on basic DPS passives first. Best Teams for Chiz Chiz performs best with teammates who can feed her energy (Charge), trigger the Surplus effect, or provide crowd control. The right squad keeps her Grain reserves overflowing and her rotations seamless. Team Setup Composition & Roles Why It Works Playstyle Focus Classic Surplus Chiz (Main DPS)Hathor (Sub-DPS, Energy/CC)Zero (Mini-Heals/Damage)Jiuyuan (CC/Grouping) Strong Remora + Blossom reactions keep Charge flowing for Chiz. Balanced boss DPS with easy rotations and consistent Grain generation. Nanally Charge Battery Chiz (Main DPS)Nanally (Sub-DPS, Fast Blossom)Zero (Sub-DPS/Heals)Jiuyuan (CC/Charge) Nanally accelerates energy gain, enabling more frequent Blossom combos and Ultimate uptime. Forgiving for longer fights; high energy uptime and smooth rotations. Mint & Lacrimosa Chaos Chiz (Main DPS)Mint (Sub-DPS, AoE Charge)Lacrimosa (DoT/Chaos)Skairi/Skia (CC/Debuffs) Combines strong AoE with Damage over Time (DoT). Speeds up mob clearing while maintaining boss pressure. Chaotic, fun rotations ideal for hybrid content (mob waves and mid-tier bosses). Is Chiz Worth Building? Absolutely—especially if you're new to Neverness to Everness. Chiz is easy to acquire, genuinely fun to pilot, and packs a serious punch in early-to-mid game content. Her Grain system offers a unique and engaging playstyle that feels active and rewarding. She excels in boss fights and teaches valuable fundamentals like timing, combo discipline, and resource management. Once you've mastered her rhythm, Chiz remains a reliable and powerful DPS for any account. Conclusion That's the complete rundown on Chiz! She is a fun, beginner-friendly character who can dish out incredible damage with the right Neverness to Everness Chiz build and team composition. Focus on mastering her skill rotation, managing your Grain economy wisely, and using the setups provided in this guide. Follow these tips, and Chiz will shine as a top-tier DPS on your roster.

  • CookieRun: OvenSmash — New Cookies and New Battles, Only in Platter City

    Just one week out of the oven and CookieRun: OvenSmash is already racking up serious numbers. With over 300 million players now reported by Devsisters, the fast-paced multiplayer brawler is serving up a fresh update that gives everyone a good reason to dive back into Platter City. First, the quality-of-life improvements. If long loading screens have been testing your patience, you're in luck—match and Plaza load times have been slashed by 60%, dropping from around 11 seconds to a snappy 4 seconds. Even better, you can now jump straight into matches from the main menu, bypassing the Plaza entirely. And you'll definitely want to queue up, because two new Epic-tier Cookies have entered the fray: Camembert Cookie (a hard-hitting Bruiser) and Brie Cheese Cookie (a precise Marksman). They arrive alongside a stylish new Golden Dragon costume series to dress up your roster. https://www.youtube.com/watch?v=xilWjbl3IGk Baked to Perfection That's not all that's fresh in this update. A new mode, Coin Rush, challenges you to scramble for 300 coins to claim victory. Meanwhile, Smash Fight graduates from limited rotation to a permanent fixture, so you can brawl whenever the craving strikes. Suffice it to say, we've got our eyes glued to OvenSmash—which is why we've stocked up on Guides and a full Code List to keep you ahead of the competition. Devsisters' gamble on a speedy, action-packed twist for their beloved CookieRun universe is clearly paying off, and we're here for the ride. While OvenSmash is a blast, don't sleep on the other Great Game that has recently landed on MEMu. There's plenty more to play beyond the oven door.

  • Neverness to Everness Hathor Build Guide

    If you just pulled Hathor or are considering adding her to your lineup, you're in the right place. This Neverness to Everness build guide breaks down exactly how she works—no fluff, just practical advice. You'll learn how to manage Express Delivery Power, maximize her Emergency Delivery burst window, and turn every fight into a calculated victory. How Hathor Plays Hathor thrives as an on-field DPS unit with a rhythmic, two-phase playstyle: Build, then Burst. The Stacking Phase: Your primary goal is to generate Express Delivery Power stacks. You'll do this by weaving together skill usage, well-timed dodges, and basic attack strings. Stay active and aim to hit the max stack count before committing to your big move. The Burst Phase: Upon activating her Ultimate, Hathor enters Emergency Delivery mode. In this state, her speed and damage output skyrocket. Do not swap characters during this window—stay on the field, spam her enhanced skills, and unload every bit of damage possible. Once the state ends, repeat the cycle. Hathor’s Skills Breakdown Understanding her kit is non-negotiable for high performance. Here’s the skill-by-skill breakdown to help you play smarter, not harder. Active Abilities & Core Mechanics Skill Description & Pro Strategy Rapid Delivery (Basic) A 5-hit combo dealing Lakshana DMG. Use this primarily to bait enemy attacks or generate early stacks while waiting for cooldowns. Priority: Low investment. Final Dispatch (Airborne) A plunging attack that scales damage with height. Excellent for initiating an AoE setup if you're already airborne. To The Skies (Hold Basic) A knock-up followed by a plunge. This is a reliable stack builder and a great setup tool for crowd control before a burst. Zero-Error Operation (Riposte) Triggered by a successful Critical Dodge. Instantly grants 1 stack of Express Delivery Power. Pro Tip: Master the timing on this—it's free stack generation. Aerial Command (Skill) Leap and slash to gain 2 stacks. Hold the skill to charge and apply Five-Star Tracking for bonus AoE DMG. This is your go-to skill for stack accumulation before using your Ultimate. Cyclone Strike (Emergency Skill) The upgraded version of Aerial Command during Ultimate mode. This skill consumes stacks for massive burst damage. Spam this as much as possible while in Emergency Delivery. Rider Express (Ultimate) Summons the motorcycle, deals AoE DMG, and activates Emergency Delivery. Crucial Warning: Swapping characters immediately ends this state. Only cast when at max stacks. Support & Passive Utility Impact Point Designation (QTE): An aerial kick that triggers two instances of AoE Lakshana DMG. Great off-field bonus damage. Delay Warning: Enhances team damage via Remora synergy and passively generates stacks. Excellent Rating Lock: If enemies linger nearby, you gain 1 stack when they attack. Essential for sustaining stack uptime during downtime. Efficiency Boost: Defeating an enemy grants 1 stack. Enables off-field stack generation even when Hathor isn't active. Best Arcs for Hathor Your Arc choice is the difference between a hit-and-run nuisance and a single-target eraser. Focus on ATK scaling and Lakshana DMG amplification to make every stack count. Hetherau’s Keeper (Signature / Best-in-Slot): Provides a massive ATK boost and extra boss damage. This is perfectly tuned for converting max stacks into devastating Emergency Delivery single-target bursts. Day Off (Strong Alternative): Offers a huge, universal ATK increase across Hathor's entire kit. Pairs exceptionally well with Arc: Eclipse for mob-heavy content and smoother field rotations. Arc: Eclipse: Ideal for restoring Field Essence on kills, allowing Hathor to stay active longer to build stacks and burst repeatedly. General Stat Sticks: If you lack the signature options, prioritize any Arc with ATK% or Lakshana DMG Bonus substats. These directly scale the power of her stacks. Team Compositions That Work Hathor demands field time. She excels in teams that enable her Remora and Charge reactions without forcing her off the stage. Here are two core setups: Premium Team – Meta Setup This lineup maximizes Remora uptime and Charge reaction consistency for the highest burst ceiling. Character Role & Synergy Hathor Main DPS. Stack builder and Remora utility core. Hotori Cosmos Support. Provides healing and boosts Blossom uptime, keeping Hathor safe during long on-field windows. Nanally Blossom Unit. Adds extra Lebenstamm and Esper Cycle follow-up attacks. Fadia Healer/Tank. Provides a +10% max HP buff and team healing, significantly improving Hathor's survivability during the stacking phase. Accessible / Budget-Friendly Team A smoother setup using more common characters that still facilitates reliable Charge reactions. Character Role & Synergy Hathor Core DPS. Zero Cosmos Filler. Helps fill the Esper Cycle quickly for Charge setups. Mint Blossom Splitter. Helps distribute Lebenblume for consistent multi-target damage. Fadia Healer. The HP buffer keeps Hathor alive while she baits and builds stacks. Stat Priorities & Build Focus To make Hathor hit like a freight train, ignore useless stats and zero in on these priorities. The goal is simple: efficient stack generation into maximum burst conversion. Stat / Focus Why It Matters ATK% The core scaling stat for all damage, especially Cyclone Strike during Emergency Delivery. Stack this wherever possible. Crit Rate Ensures your Cyclone Strike and riposte counters actually crit, translating stacks into consistent high numbers. Crit DMG Multiplies the value of every critical hit, making her burst window truly devastating. Lakshana DMG Bonus A specific multiplier for her Plasma-element skills. Prioritize this if you want max skill damage over raw ATK. Survivability / HP Hathor is a melee brawler who needs to bait attacks. A dead Hathor builds zero stacks. Moderate HP investment ensures she lives long enough to pop Ultimate. Mobility / Movement Speed While not a primary stat roll, movement speed buffs improve her ability to dodge and reposition during the Emergency Delivery state, indirectly increasing stack uptime. Pro Tips & Advanced Tricks Mastering Hathor is about rhythm and restraint. These tips separate good pilots from unstoppable ones. Stack First, Ult Second: Never activate Rider Express before hitting 6 stacks of Express Delivery Power. The damage difference is exponential. Bait for Free Stacks: Use Five-Star Tracking and Excellent Rating Lock intentionally. Let enemies swing at you to generate stacks without spending cooldowns. Commit to the Burst: Do not swap characters during Emergency Delivery. The state ends instantly. Plan your support skills and healing before you press the Ultimate button. Hold for Impact: With Aerial Command, holding the charge applies Five-Star Tracking and generates extra stacks. Only tap the skill if you need a quick dodge reposition. Leverage Remora: Her support passive boosts team-wide damage. She slots best into Charge or Blossom-centric teams to amplify overall clear speed. Mobility is Mitigation: Use the motorcycle from the Ultimate and Blade Wings not just for damage, but to actively dodge lethal boss mechanics while still dealing damage. Conclusion This Neverness to Everness Hathor build guide gives you the blueprint: build stacks methodically, time your Rider Express perfectly, and commit fully to the Emergency Delivery window. With the right team and a sharp understanding of her flow, Hathor transitions from a simple DPS into a dominant, crowd-shredding force capable of carrying any fight.

  • Garena Free City Extends Soft Launch; Mobile Players in New Regions Can Now Join the Crime Adventure

    Garena Free City, the highly anticipated GTA-style open-world RPG, has officially expanded its soft launch to the Philippines. After successful early access phases in Thailand and Indonesia, and a subsequent soft launch in Argentina, mobile gamers in the Philippines can now jump into the action on both Android and iOS. This expansion follows the game’s initial pre-registration kickoff back in April 2025. <memubtn game_id=161550&ext=20260410></memubtn> Rule the Streets: Garena Free City Expands Its Reach! Don't sleep on the world of Garena Free City. This GTA-inspired open-world RPG has already blasted past 1 million downloads on the Play Store, and the chaos is just getting started. We’ve just expanded to a brand-new region, giving even more players the chance to dominate in high-stakes PvP battles and gritty PvE missions. Dive in and conquer the underworld by any means necessary! Garena Free City Gameplay (Image via Garena Mobile Private Limited) First of all, the story takes place against a Western gangster theme, like the GTA series, where you team up with allies to take down various gang bosses, all while surviving intense shootouts, car chases, and even undercover assassinations. Here too, your main goal is to take control of this city of freedom. Fully Loaded: Customization and Co-op Gameplay In Garena Free City, the customization goes far beyond just aesthetics. While picking out the perfect convertible, sports car, or heavy-duty cargo vehicle is a blast, you can also modify your arsenal. Tuning your weapons for better firepower and sleek designs is essential for surviving the city’s intense gang wars and multiplayer modes. As a long-time GTA fan, I’m genuinely impressed—the game feels incredibly polished compared to other clones. Whether you're teaming up for high-stakes bank heists or just messing around in bumper car battles, the content is top-tier. It honestly makes you wonder: will this hit the global stage before GTA VI? Now Available in the Philippines Following its success in Argentina, Garena Free City has officially expanded its soft launch to the Philippines. You can grab it now on the Google Play Store via MEmu play. Keep an eye out for more global launch updates!

  • Star Savior Roadmap Summary For April & May

    Ryuko-chan’s Special Broadcast Celebration Gift 500 Diamonds for all players who log in between April 8–12, 2026 (server time). Claim via in-game mail. Update Content – April 9, 2026 1. Server Maintenance Time: 10:00 – 12:00 (UTC+9) Compensation: 100 Diamonds + 2x Blue Character Summon Tickets 2. New Pickup Gacha – Elisa (Dark Healer) Duration: After maintenance on April 9 – April 23, 2026, 02:00 Details: Pickup Gacha for character Elisa and Arcana Card "Divine Trial" is now available. 3. Cosmo Gate Galaxy Season 2 Duration: April 9 (08:00) – April 16, 2026 (02:00) Details: Season 2 Boss Challenge stages open. Earn extra rewards based on ranking. 4. New Event – Dungeon Raider Duration: April 9 (10:00) – April 17, 2026 (02:00) Details: New event stage added to Candle Square. Earn rewards and event points to exchange in the shop. 5. Login Bonus – Dungeon Raiders (5 Days) Duration: April 9 (10:00) – April 17, 2026 (02:00) Details: Claim one free item per day from the event page (max 5 days). 6. Login Bonus – Flash Point Expansion (10 Days) Duration: April 9 (10:00) – April 23, 2026 (02:00) Details: Claim one free item per day from the event page (max 10 days). 7. New Packages in Cash Shop 8. General Improvements & Adjustments Tactical Analysis max level increased to Lv.200 Improved English descriptions in battle result screens Chat unlock condition changed to clearing stage 2-12 Improved in-game profanity filter Icon updates for Apocalypse Support Box, Town Guard Support Box, and Candle Square Support Box (makes resource x2 boxes easier to recognize) Future Update Spoilers New Story Event – "Wind Moon and Blade" (Arriving after April 16, 2026 patch) Lyn (Sticker / Light Element) Unique mechanic: Skill effects change based on usage order. Story snippet: A young woman from the Wind Moon Sect. Before coming to NOA, she worked as a teacher of manners for children. She still speaks like a teacher… except for her habit of adding herbs to every dish. Otherwise, she’s a perfect teacher for kids. Catchphrase: "Good job! The teacher will pat your head as a reward… pat, pat~" Fei (Assassin / Water Element) Specializes in counterattacks and evasion. Story snippet: A wandering fighter, former disciple of the Wind Moon Sect. She accidentally discovered a secret technique of the Celestial Seekers sect and became obsessed with it. She enthusiastically praises this sect to everyone around her, but they just think she’s weird. Catchphrase: "The Celestial Seekers are the absolute best! Everyone should come to appreciate this!" Rerun Story Event – "Candlelight Rabbits and Banquet" Date: May 7, 2026 – For Global players who haven’t experienced it yet. Main Story Chapter 5 – "Lingering Wings on the Street" New character: Apostle Tiria (Striker / Fire Element) https://www.youtube.com/watch?v=TBY2Yc9DsH0

  • Neverness to Everness Nanally Build Guide

    Neverness to Everness plunges players into a vibrant, supernatural urban world where anomaly hunting meets high-octane combat, and Nanally Coluccis stands out as one of the strongest launch characters for anyone pursuing top-tier main DPS power. As the steadfast leader of the Coluccis family and the star of Eibon Antique Shop in Hethereau's Bridge District, she delivers reliable burst damage, crowd control through follow-up attacks, and unique mobility that excels in both exploration and challenging encounters. This Neverness to Everness Nanally build guide is designed to help you unlock her maximum potential. Nanally's Core Playstyle and Skills Nanally's combat identity revolves around fluid, high-impact Anima damage that feels both street-smart and flashy. She bares her fangs and claws for rapid multi-hit combos that remain uninterrupted by dodging, granting you complete freedom to reposition mid-fight. Let's dive into Nanally's key skills: Basic AttacksHolding the basic attack button unleashes heavier strikes—powerful punches and kicks that can chain off critical ripostes or specific combo points for additional stun and Break value. Her aim-mode finger gun delivers precise single-target shots, ideal for picking off priority threats during boss encounters. Skill: Colucci Howling TechniqueThis is Nanally's signature ability and a genuine game-changer. It blasts area damage around her and envelops her in Anima energy, entering the Ichi-daime's Authority state for up to 12 seconds. While this state is active, Nanally gains increased Crit Damage and the ability to ignore gravity—allowing her to walk on walls, ceilings, or any surface freely. This anti-gravity mobility transforms vertical urban environments into your playground, enabling you to dodge attacks from above, flank bosses, or simply traverse Hethereau faster while maintaining offensive pressure. Recast the skill if you need to exit the state early. Ultimate: Colucci Ultimate TechniqueThis ability delivers immediate area damage and summons the Underboss to fight alongside Nanally. While active, the Underboss coordinates with every one of Nanally's attacks, adding follow-up Anima hits and creating a small pull effect on nearby foes. This transforms her into a burst-damage machine capable of clearing groups or melting single targets—especially when paired with appropriate reaction triggers. Signature moves like the Coluccis Ultimate Death Shadow Nether Punch tie into these big moments, sweeping opponents aside in her signature undefeated style. Mastering a top-tier Neverness to Everness Nanally build means prioritizing the Ichi-daime's Authority window for crit-boosted combos and timing the Underboss summon to maximize follow-up chains. Her forgiving nature—dodge-proof basics and strong base damage—makes her an ideal choice for players still learning anomaly containment fights or freely exploring the open world. Best Arcanum Sets for Nanally Nanally's damage output relies heavily on basic attacks and skill/ultimate bursts, so Arcanum choices should focus on ATK boosts, basic attack amplification, and boss-specific damage. Here are the top recommended sets: Ready-Ready (Primary Set): Provides a solid ATK percentage increase. Casting a Skill or Ultimate boosts Basic Attack damage for 15 seconds (stackable up to twice). This set also generates Talismans that can trigger the Commander Tiger Talisman effect for extra boss damage. It perfectly supports Nanally's combo-heavy playstyle and Ultimate windows, scaling her output effectively in both story boss fights and endgame challenges. Oraora! (Secondary/Complementary Set): Stacks Basic Attack damage bonuses every time you use a Basic Attack, up to 10 stacks. This directly amplifies her core claw combos and heavy hitters, making sustained DPS smoother during the Authority state. Aim for Level 2 upgrades on these Arcanum wherever possible to secure higher percentage bonuses. Substats should prioritize Crit Rate, Crit DMG, ATK%, and Anima DMG Bonus to push her damage multipliers further. These choices keep her straightforward to gear while delivering competitive performance right from the early game. Optimal Team Compositions for Nanally Nanally thrives in teams that trigger the Genesis Reaction for constant Genesis Bud explosions and the Covering Pattern for damage amplification. Her passive ability significantly enhances these buds, turning the battlefield into a chain-reaction zone. Here are the strongest team compositions for Nanally based on the current Neverness to Everness tier list: Team SetupRolesWhy It WorksPlaystyle FocusNanally + Zero + Jiuyuan + SakiriMain DPS / Sub-DPS / Sub-DPS / SupportFast Genesis Reaction with Zero creates buds that Nanally supercharges for massive AoE explosions. Sakiri adds Covering Pattern for burst amplification. Jiuyuan contributes crowd control and supplemental damage.High AoE clear with chain reactions; excellent for both mobs and bosses.Nanally + Zero + Hathor + AdlerMain DPS / Sub-DPS / Battery / SupportFast Genesis Reaction with Zero creates buds that Nanally supercharges for massive AoE explosions. Sakiri adds a Covering Pattern for burst amplification. Jiuyuan contributes crowd control and supplemental damage.Boss-focused with frequent Ultimates and safe sustain. These compositions leverage Nanally's follow-up mechanics to their fullest, keeping her firmly in the spotlight while supports enable her most impactful moments. Feel free to swap in other Anima-friendly units as your roster expands, but these pairings currently deliver the highest clear speeds for available content. Ascension, Leveling, and General Tips Skill Priority: Level Nanally's Basic Attack and Skill first to establish core damage output, then invest in her Ultimate to maximize burst windows. Mobility Advantage: Nanally's anti-gravity walking isn't just for combat—it significantly speeds up world exploration. Use it to reach hidden anomaly spots or collect resources faster across Hethereau's districts. Leverage this unique traversal ability in open-world puzzles or to instantly reposition during hectic fights. Meta Relevance: As a launch S+ tier DPS, Nanally remains highly relevant for early-to-mid game progression and continues to perform strongly in boss content thanks to her boss-damage Arcanum scaling. Playstyle Note: Focus on reaction timing over perfect rotations. Nanally's kit is forgiving of minor mistakes while generously rewarding good positioning and awareness. Conclusion You're now equipped to master the ultimate Neverness to Everness Nanally build. By applying the tips and strategies outlined in this guide, you'll extract the absolute best performance from this formidable Anima DPS. With the right setups in place, Nanally will prove exactly why she's a dominant force in the streets of Hethereau.

  • Neverness to Everness Mint Build Guide

    Mint is a cheerful A-Rank Anima (Liquid/Wind) character in the Neverness to Everness tier list, serving as an energetic member of the Bureau of Anomaly Control's Containment Unit 2. Wielding dual blades, she brings a mobile, tornado-focused combat style that emphasizes crowd control and area damage. Most players are drawn to her for her vibrant personality and easy-to-learn kit, which performs solidly against enemy groups during story progression and exploration across Hethereau. However, to unlock her true potential, you'll need the optimal Neverness to Everness Mint best build—and this guide will provide exactly that. Mint's Role and Core Playstyle Mint functions primarily as a sub-DPS or secondary damage dealer with strong AoE capabilities. Her kit revolves around fluid basic attack chains, well-timed critical dodges, and transforming into a moving tornado for sustained area damage. Mint benefits from staying active on the field to provide team utility and excels in encounters with multiple enemies, where her whirlwind attacks efficiently clear packs. Key playstyle elements for Mint include: Timing Critical Dodges to trigger riposte attacks that deal area damage and reduce enemy Break values. Using hold basic attack to enter tornado form, allowing continuous Anima damage while moving (manage stamina carefully to avoid leaving yourself vulnerable). Incorporating aerial plunges after jumps or dodges for additional area impact. Building energy for her Ultimate to unleash powerful AoE bursts. Leveraging her Blossom enhancement passive, which improves reaction explosions when paired with compatible teammates. Mint's strengths lie in her accessibility and high fun factor, while her limitations become apparent in pure single-target boss encounters. We recommend practicing combos in the training area to master the flow of dodge → riposte → skill → tornado spin. Mint Skills and Abilities Overview Mint's abilities focus on Anima damage with an emphasis on mobility and area coverage—key components of any strong Neverness to Everness Mint build. Here are her core confirmed mechanics: Basic Attack: Perfect ContainmentPerforms up to five consecutive dual-blade strikes dealing Anima DMG. This serves as the foundation for all combos. Basic Attack: Justice from AboveAn aerial plunge that deals area Anima DMG upon impact, with damage scaling based on fall height (up to a notable bonus). Critical Riposte: Caramel CrispActivates after executing a Critical Dodge followed by Perfect Containment. Mint leaps to evade incoming damage, then swings to deal area Anima DMG while reducing enemy Break. Hold Basic Attack (Tornado Form)Transforms Mint into a moving tornado that deals continuous Anima DMG to nearby enemies. You can freely reposition during the spin. Skill: Super ClawsDashes forward and returns to the starting position, dealing two instances of AoE Anima DMG along the path. This serves as a reliable gap-closer with a short cooldown. UltimateA high-damage AoE whirlwind attack (frequently showcased in trailers as a flashy multi-hit slash with a powerful finish). It channels wind energy for multiple area strikes. QTEProvides an entry attack with penetrating AoE Anima damage, useful during team swaps. Passives Transform! Super Mint! (Blossom Enhancement): Enhances Blossom reactions by causing each Lebenblume to split into two before exploding toward targets. Bingo! We're Done Here!: While Mint is on the field, the team gains increased DEF and improved resistance to interruptions for better survivability. These tools make Mint's rotations feel dynamic and rewarding, placing a premium on good positioning and reaction timing. Weapon Recommendation: Youthful Fantasy Youthful Fantasy stands out as Mint's signature Arc weapon. It provides an ATK% bonus to the wearer (scaling with refinement levels, reaching up to 20% at higher ranks) and unlocks the Arc: Black Tome ability. This Arc seals enemies with chains triggered by actions such as Critical Dodges, Parry Attacks, Entry Attacks, or Skills. When all chains release, it summons the Black Tome to bind multiple enemies for a duration, reducing their Chaos RES (with the reduction strengthening at higher weapon levels, up to a significant team-wide benefit). Stat Priorities and Gear (Tetris Pieces / Console) Focus your Neverness to Everness Mint build on amplifying Anima damage and critical hits, as these align directly with her kit: Priority Stats: Anima DMG Bonus, Crit Rate, Crit DMG, ATK%Useful Sub-stats: Break Effect, Energy Recharge (to enable more frequent Ultimates) For Tetris Pieces (the game's artifact-like system), Mint gains +8% Crit Rate for every Type III Tetris Piece equipped. This unique set bonus makes prioritizing Type III pieces highly effective for boosting her critical output. Aim for set effects that further increase Anima DMG or Crit whenever available. Console setups should emphasize ATK% and Crit stats early on, with flexibility to include Break or defensive options depending on content difficulty. The typical upgrade order starts with the weapon, followed by key Tetris pieces to maximize the Crit Rate multiplier. Best Neverness to Everness Mint Team Compositions Mint is a valuable addition to teams that capitalize on her Blossom enhancement and on-field presence. She pairs naturally with characters who trigger reactions or provide sustain, allowing her to remain active longer for extended tornado clears. Common synergistic setups for Mint include: Teams featuring Nanally or Zero as the main carry, with Mint contributing Blossom splits and AoE support. Inclusion of Fadia for healing and shields to improve safety during her spin animations. Skia or similar crowd-control options to group enemies for better tornado uptime. Flexible healer/support slots to cover survivability in tougher encounters. Mint works exceptionally well as a Blossom enhancer alongside Cosmos or Anima-focused drivers, helping create smoother AoE pressure and reaction chains. We recommend experimenting in story or exploration content first, then adjusting for higher-difficulty commissions or boss fights. Due to her lower single-target focus, she shines brightest as a secondary damage dealer or fun exploratory pick rather than a primary endgame boss melter. Progression Tips for F2P and Beginners Mint is relatively material-efficient and obtainable through standard means, making her a practical early investment for players who appreciate her design and playstyle. Focus on story rewards, free selectors, and event resources to gradually level her skills and awakenings. Awakenings (unlocked via duplicates) provide meaningful improvements to her kit, particularly those enhancing ripostes, ultimates, or team utility. Many players note that these upgrades help push her viability further despite baseline limitations. Prioritize weapon upgrades and Crit-focused gear before committing heavily to resonance investment. In late-game scenarios, Mint transitions comfortably into sub-DPS or support roles within reaction-based teams. Keep an eye on future patches for potential balance adjustments, and always cross-reference in-game tooltips for the most up-to-date values. Conclusion That concludes our Neverness to Everness Mint best build guide. Mint rewards players who value cheerful, whirlwind-style combat and team reactions over raw meta numbers. With consistent practice and the right setup, she can make clearing anomalies and exploring the city feel lively and engaging. By following the guidance and tips provided here, you'll ensure Mint shines brighter than ever throughout your gameplay experience.

  • Neverness to Everness Lacrimosa Build Guide

    Hey players—if you're planning to build Lacrimosa or just pulled her, this Neverness to Everness Lacrimosa build guide is exactly what you need. She might look perpetually sleepy, but she's a formidable DoT character capable of melting enemies over time when played correctly. In this guide, we'll walk you through her skills, optimal builds, team compositions, and practical tips so you can pilot her smoothly and maximize her potential. Who Is Lacrimosa? Lacrimosa is a powerful Chaos sub-DPS who excels at stacking damage over time through her unique Nightmare mechanic. Rather than rushing enemies down with burst damage, she methodically builds pressure, allowing her constructs and copied abilities to do the heavy lifting while her DoT effects steadily drain enemy health. Quick Overview Rarity: S-Rank Element: Chaos Role: Sub-DPS with Strong DoT Weapon: Frying Pan / Red Jelly Strengths Consistent damage over time via Nightmare stacks Excellent against both bosses and enemy groups Unique skill-copying ability (high flexibility) Superior mobility with bat transformation Lacrimosa Core Mechanics If you want to truly understand how Lacrimosa operates, this section of the Neverness to Everness Lacrimosa build guide is the most critical. Lacrimosa revolves entirely around stacking her Nightmare effect and letting enemies slowly succumb to its damage. Once you grasp these core mechanics, the rest of her kit becomes intuitive. MechanicHow It WorksNightmare StacksApplied on every hit (1 stack per damage instance); caps at 10 stacks. Deals Chaos DoT every second—this is her primary damage source.Stacking SystemMulti-hit attacks or abilities that deal multiple damage instances build stacks rapidly, making her basic attack string essential.DoT DamageDamage accumulates over time rather than instantly, making her exceptionally strong in prolonged encounters.Healing InteractionEnemies lose 1 Nightmare stack when healed (at higher Awakening levels, stacks are not removed and instead reduce max HP).AoE ApplicationSkills and Ultimate apply Nightmare to multiple enemies simultaneously.Detonation (A3)With A3 unlocked, her 5th basic attack can instantly trigger all existing Nightmare stacks for significant burst damage.Mimic AbilityCan copy enemy skills to deal extra damage or provide utility. Lacrimosa Skills Understanding Neverness to Everness Lacrimosa skills is the key to unlocking her full potential. Each ability works in concert to stack Nightmare, duplicate enemy powers, and control the battlefield. Here's the detailed breakdown: Basic Attack – Sweet and SourLacrimosa's basic attack features two interchangeable modes: Tomato Metal (frying pan swings) and Tomato Percussion (red jelly strikes). Each mode delivers up to five consecutive attacks dealing Chaos damage and applying Nightmare stacks. The first four hits cover a small AoE (excellent for mob clearing), while the fifth hit delivers a powerful knockback blast capable of detonating Nightmare stacks. The active mode also influences the behavior of her Ultimate. Skill – Morning TomatoMorning Tomato is Lacrimosa's primary AoE ability, designed to spread Nightmare stacks across multiple enemies quickly. It serves as an efficient tool for building stacks on clustered foes. Additionally, you can chain this skill directly into her fifth Basic Attack to unleash a devastating burst of Chaos damage. It's particularly effective against enemy waves or when you need to apply immediate pressure to a boss. Skill – Devilish GiftDevilish Gift is where Lacrimosa's true versatility shines. This skill allows her to copy an enemy or ally's skill, generating mimic constructs that deal damage and replicate the original ability's effects. The utility is immense—you can appropriate high-damage boss attacks or even borrow ally skills to extend combo chains. Note, however, that Lacrimosa cannot move while casting, and incoming hits will interrupt the channel, making precise timing essential. Ultimate – Working Day JudgementHer Ultimate summons a colossal Esper construct to unleash multiple instances of AoE Chaos damage while applying Nightmare to all enemies within range. The attack pattern shifts depending on her active Basic Attack flavor (Tomato Metal vs. Percussion). This serves as your primary nuke—ideal for detonating accumulated Nightmare stacks for maximum effect or finishing off dense mob clusters. QTE – Microwake / Critical RiposteLacrimosa's QTE-style abilities provide supplementary bursts of AoE damage to smooth out her rotation. Microwave uses her constructs to deal Chaos damage in a targeted area, while Critical Riposte activates after a perfect dodge, launching a jelly-based counter that strikes multiple enemies. While their individual damage contribution is modest compared to her core skills, these abilities are valuable for accelerating Nightmare stack generation and rounding out her overall damage profile. Full Kit Overview The Neverness to Everness Lacrimosa kit includes passives, mobility options, and support effects that enhance her flexibility and combat flow. From aerial bat form to Nightmare amplification, every component helps you control engagements and sustain pressure. Kit FeatureWhat It Does / How It HelpsTomato Banquet (Passive)Reduces enemy Break cap when Discord is applied, making it easier to control resilient foes.Sleep In (Passive)Grants an additional charge of Morning Tomato after landing 5 Basic Attacks, accelerating Nightmare stacking.Sleepwalk (Passive)Allows Lacrimosa to fly in bat form while out of combat—excellent for exploration and strategic positioning.Dodge & MobilityTap dodge for quick evasive sidesteps; hold dodge to transform into bat flight for swift repositioning during combat.Chef Tomato (Life Skill)Increases shop dish appeal and selling prices—a flavorful bonus, though not combat-relevant. How to Play Lacrimosa To extract maximum value from Lacrimosa, mastering her unique rhythm is essential. With this Neverness to Everness Lacrimosa build approach, you'll focus on efficient Nightmare stacking, well-timed skill usage, and leveraging her mobility to stay safe while delivering consistent damage. Stack Nightmare Efficiently: Use Basic Attacks and Morning Tomato to build stacks quickly. Higher stack counts translate directly to increased DoT pressure. Use Devilish Gift Wisely: Copy enemy or ally skills at opportune moments to maximize damage output or utility. Timing is everything—avoid channeling during heavy enemy aggression. Ultimate Timing: Save Working Day Judgement to spread Nightmare across fresh waves or to finish off weakened bosses. Sync it with active Nightmare stacks for devastating burst potential. Mobility & Dodge: Use short dodges to evade attacks and hold dodge to enter bat flight for kiting or rapid repositioning. Team Awareness: Pair Lacrimosa with Discord or Chaos-focused allies to amplify her passive benefits and overall Nightmare damage. Best Builds for Lacrimosa Optimizing a Neverness to Everness Lacrimosa build revolves around boosting her Nightmare damage, critical stats, and survivability. With the proper weapon, stat priorities, and Awakening investment, she evolves into a premier sub-DPS capable of excelling against both mobs and bosses. Build ElementRecommendation / TipsMain StatsPrioritize Critical Damage → ATK → Sink Strength. These maximize her burst and DoT potential.Secondary StatsEnergy Regen, Skill Range, and Attack Speed help streamline rotations and Ultimate uptime.Star AscensionRush to Level 60 first to unlock the full benefits of her stat panel.Signature WeaponEquip her Esper Constructs weapon for +20% ATK, +15% HP, +12% Chaos DMG, and enhanced Nightmare synergy.Awakening PriorityA3 (Molten Ice Cream) > A1 (Clock Out Clemency) > A5 (Tempered Glass Judgement) for optimal damage and utility scaling.Star Soul PathsFocus on Nightmare Amplification → Mimic Enhancement → Ultimate Skill Range for strongest performance. Is Lacrimosa Worth Building? Yes, Lacrimosa is absolutely worth building if you enjoy a methodical, high-reward playstyle. She grows progressively stronger as you master Nightmare stacking and excels in longer engagements, especially against bosses. While her early-game tempo may feel deliberate, once you internalize her timing, she emerges as a consistently reliable and powerful sub-DPS. Moreover, her compatibility with various Chaos-oriented team compositions ensures she remains a flexible asset across different content. Conclusion That concludes this Neverness to Everness Lacrimosa build guide. She may appear deceptively relaxed at first glance, but once you get comfortable with stacking Nightmare and timing her signature skills, she becomes immensely satisfying to play. Take your time to learn her cadence, and you'll witness her damage snowball with every encounter.

Top Games

  • Garena Free Fire PC

    Garena Free Fire

    Action · GARENA INTERNATIONAL I

  • PUBG MOBILE PC

    PUBG MOBILE

    Action · Level Infinite

  • Call of Duty Mobile PC

    Call of Duty Mobile

    Action · Activision Publishing, Inc.

  • Among Us PC

    Among Us

    Action · Innersloth LLC

  • Mobile Legends PC

    Mobile Legends

    Action · MOONTON

  • Brawl Stars PC

    Brawl Stars

    Action · Supercell

  • Clash of Clans PC

    Clash of Clans

    Strategy · Supercell

  • Clash Royale PC

    Clash Royale

    Strategy · Supercell

  • Lords Mobile PC

    Lords Mobile

    Strategy · IGG.COM

  • GTA 5 PC

    GTA 5

    Action · ImpulseGaming

  • SCHOOLBOY RUNAWAY - STEALTH PC

    SCHOOLBOY RUNAWAY - STEALTH

    Arcade · Linked Squad

  • Tekken 3 PC

    Tekken 3

    Action · BANDAI NAMCO Entertainment Inc.

  • Garena Free Fire Max PC

    Garena Free Fire Max

    Action · GARENA INTERNATIONAL I

  • Bus Simulator Indonesia PC

    Bus Simulator Indonesia

    Simulation · Maleo

  • Indian Bikes Driving 3D PC

    Indian Bikes Driving 3D

    Simulation · Rohit Gaming Studio

  • Love and Deepspace PC

    Love and Deepspace

    Simulation · InFold Pte. Ltd.

  • Hay Day PC

    Hay Day

    Casual · Supercell

  • Crafting and Building PC

    Crafting and Building

    Adventure · GeneRe

  • Car Parking Multiplayer PC

    Car Parking Multiplayer

    Simulation · olzhass

  • Magic Chess: Go Go PC

    Magic Chess: Go Go

    Strategy · Vizta Games

  • Supermarket Simulator PC

    Supermarket Simulator

    Simulation · KATIE LOUISE JEE

  • BATTLEGROUNDS MOBILE INDIA PC

    BATTLEGROUNDS MOBILE INDIA

    Action · KRAFTON, Inc.

  • Predictor Aviator PC

    Predictor Aviator

    Arcade · MobisMobis

  • Car For Sale Simulator 2023 PC

    Car For Sale Simulator 2023

    Simulation · Westeight Studio

MEmu

Play With The Best Android Emulator

MEmu
DOWNLOAD
MEmu

Follow us

  • Facebook
  • X
  • Youtube

Support & Contact

  • MEmu Support
  • Facebook Group
  • Discord
  • Email

Popular Games on PC

  • Garena Free Fire PC
  • PUBG MOBILE PC
  • Call of Duty Mobile PC
  • Among Us PC
  • Mobile Legends PC
  • Brawl Stars PC
  • Clash of Clans PC
  • Clash Royale PC
  • Lords Mobile PC
  • GTA 5 PC

Top Apps on PC

  • WhatsApp Messenger PC
  • Instagram PC
  • Facebook PC
  • WhatsApp Business PC
  • Facebook Lite PC
  • Snapchat PC
  • BIGO LIVE - Live Stream PC
  • Likee - Let You Shine PC
  • HAGO PC
  • MeetMe: Chat & Meet New People PC

More Games on PC

  • Game Center

About

  • About Us
  • Android Emulator
  • MEmu 9.0

Download

  • Download

Business

  • MEmu for Business

Copyright © 2026 Microvirt. All Rights Reserved.|Terms of Use|Privacy Policy|About Us