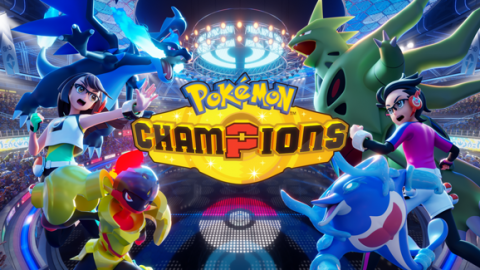
Pokémon Champions hasn't been out long, but as with every competitive game, a clear line has already formed between the best of the best and everyone else. What makes a Pokémon top tier in Pokémon Champions can come down to raw stats, a powerful gimmick, a game-changing Mega Evolution, or some combination of all three.
No Pokémon can guarantee you a win, even the ones sitting at the top of the meta. But if you take the time to master what makes these Pokémon so effective, you'll find yourself climbing the ranks much faster. Just keep in mind that plenty of other trainers are running the same Pokémon, so the real edge comes from learning the matchups well enough to make these picks your own.
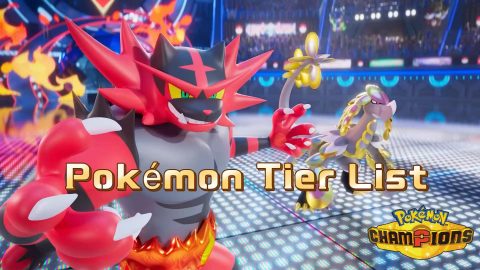
ContentsHow This Pokémon Champions Tier List WorksSS-Tier PokémonSneaslerGarchompS-Tier PokémonIncineroarEternal Flower FloetteKingambitA-Tier PokémonCharizard (Mega Charizard Y)FroslassPelipperRotom (Wash)BasculegionAerodactylB-Tier PokémonSinistchaConclusion
How This Pokémon Champions Tier List Works
If you've seen a tier list before, you probably already have a sense of how the ranking system works: SS sits at the top, and every tier below it gets gradually weaker. That doesn't mean S, A, or B tier Pokémon. It just means they come with a few more strings attached than an SS-tier Pokémon does.
Tier lists can have as many ranks as the person building them wants, but this guide focuses on the strongest Pokémon currently available in Pokémon Champions, so we're only covering SS through B. Anything not mentioned here can be assumed to fall into C tier or below.
Here's what each tier actually means:
TierWhat It MeansSSNearly perfect in every way: excellent stats, a strong move pool, and sometimes a Mega Evolution that pushes them even further. Strong in both Single and Double Battles.SA solid addition to almost any team, but held back by one small weakness. That weakness is usually easy to cover with the right moves, items, or stat investment.ACan perform at an SS or S level, but only under the right conditions. These Pokémon often need a team built around them, work best in only one battle format, or carry a weakness that leaves them exposed.BBetter suited to a support role than a damage-dealing one. If one of these ends up being your last Pokémon standing, you're probably in trouble.
SS-Tier Pokémon
Sneasler
If you've spent any time in Ranked Battles, you've almost certainly run into Sneasler. It isn't the Pokémon you'd expect to top a stat sheet, but the tools available to it in Champions make it a genuine threat in both Single and Double Battles, even after a small nerf to Dire Claw and without access to a Mega Evolution.
Pair the Unburden ability with a White Herb, and Sneasler can essentially guarantee it never loses its speed advantage. Add in Close Combat for STAB, plus Fake Out and Protect, and Sneasler becomes well worth the risk that comes with its common type weaknesses.
It fits naturally into almost any team composition. In Doubles specifically, you can even put Protect on a teammate instead, freeing up a move slot on Sneasler for extra coverage.
Garchomp
Unlike Sneasler, Garchomp earns a near-automatic spot at the top of just about any Pokémon tier list. It's a genuine monster, strong enough that you don't even need its Mega Evolution to make it the best Pokémon on your team.
Its stats are outstanding, both of its abilities are useful depending on your team composition, and it has enough item flexibility to be shaped around your personal playstyle.
Earthquake remains a non-negotiable pick for Garchomp's move set, and it pairs well with either Dragon Claw or Stomping Tantrum, the latter being especially useful for punishing Protect. Rock Slide and Protect round things out nicely.
S-Tier Pokémon
Incineroar
Incineroar is still strong in Single Battles, but its clear advantage in Doubles is what keeps it at S instead of SS. That advantage comes almost entirely from Intimidate, an ability you should never consider replacing on this Pokémon.
Because Intimidate lowers both opponents' Attack stats the moment Incineroar enters the field, it puts your team in a favorable position before a single move is thrown. Its main vulnerability is Fighting-type moves, but a Chople Berry, combined with a Sinistcha running Protect and Rage Powder, easily papers over that weakness.
Common move sets include Fake Out, Parting Shot, Throat Chop, Flare Blitz, Helping Hand, and Protect, giving you plenty of flexibility to build around it.
Eternal Flower Floette
This is probably the most frustrating entry on this Pokémon Champions tier list, simply because it's far too strong to be this exclusive. Getting Eternal Flower Floette requires owning and completing Pokémon Legends: Z-A, so it won't be an option for everyone.
That said, it's hard to overstate how dangerous this Pokémon is, particularly against Dragon-types. It functions almost like an unofficial pseudo-legendary in practice.
You'll want to run its Mega Evolution here, which means equipping Floettite and the Flower Veil ability, which transitions into Fairy Aura once Mega Evolved. Calm Mind and Protect are essentially mandatory, while the remaining moves usually come from some mix of Moonblast, Dazzling Gleam, Light of Ruin, and Draining Kiss.
Kingambit
Kingambit is a relatively new addition to the competitive scene, but it's carried a strong presence ever since its debut in Pokémon Scarlet and Violet, and that hasn't changed in Pokémon Champions.
Its signature move, Kowtow Cleave, is a guaranteed-hit Dark-type attack that hits even harder with a Black Glasses equipped. A Chople Berry is also a reasonable alternative, especially as protection against Sneasler. Sucker Punch, Protect, and Swords Dance typically fill out the rest of its move set.
Since 6v6 matches aren't part of Pokémon Champions, Supreme Overlord doesn't carry the same weight it does elsewhere. Fortunately, Kingambit's Attack stat is high enough to hit hard without it, and Defiant works well as a backup ability.
A-Tier Pokémon
Charizard (Mega Charizard Y)
For Sun teams, Mega Charizard Y is close to mandatory. Charizard is already a strong Pokémon on its own, but equipping Charizardite Y grants the Drought ability, setting up Sun automatically instead of requiring a separate Pokémon to do it.
From there, Protect, Weather Ball, and Heat Wave are the core of its move set, with Air Slash or Solar Beam filling the final slot depending on preference. The real goal is simply to take full advantage of Drought for the rest of the team.
Froslass
Mega Froslass is the centerpiece of any Snow team. Like Mega Charizard Y, it carries an ability that immediately triggers its respective weather, in this case Snow, for five turns.
That means Froslassite needs to be equipped at all times. From there, Aurora Veil, Blizzard, Protect, and Shadow Ball let Froslass make the most of its own kit, while the rest of the team can be built to support it.
Pelipper
Basculegion plays an important role on Rain teams too, but Pelipper is the one you genuinely need, purely because of Drizzle. Like the other weather setters on this list, Pelipper can trigger Rain the instant it enters battle, and unlike Charizard or Froslass, it doesn't even require a Mega Evolution.
Drizzle should always be equipped with Hurricane and Muddy Water as core moves. From there, Weather Ball, Icy Wind, Tailwind, or Protect can round out the set based on what your team needs most.
Rotom (Wash)
Rotom isn't a bad Pokémon in general, but Rotom Wash specifically stands out thanks to its Electric/Water typing. That combination leaves it with only two type weaknesses on paper, Grass and Ground, and Levitate cancels out the Ground weakness entirely.
That leaves Rotom Wash with effectively one weakness and a long list of useful resistances. Add in Hydro Pump and Thunderbolt, and you've got a uniquely defensive yet threatening Pokémon that slots into nearly any team.
Basculegion
Basculegion's Water/Ghost typing gives it a strong mix of power and survivability, especially on Rain teams. Its base stats aren't flashy, but the combination of its ability and move pool makes it a genuine threat.
Adaptability doubles its STAB damage, and paired with Last Respects, Flip Turn, and some combination of Wave Crash, Liquidation, and Aqua Jet, Basculegion can dominate a match even with limited time on the field. A Choice Scarf turns its Flip Turn into a near-guaranteed free pivot at the start of a game.
Aerodactyl
Aerodactyl closes out A tier, and there's nothing wrong with it exactly; it just doesn't have the standout trait that some of its peers do.
It's a reliable, well-rounded Pokémon with access to strong moves like Dual Wingbeat, Tailwind, and Rock Slide, but it's unlikely to be your team's centerpiece. A Focus Sash is generally a better investment than its Mega Evolution.
Overall, Aerodactyl is a strong, flexible team member regardless of archetype, even if it shouldn't be your designated ace. It also offers the fastest Tailwind setup in the game, which is reason enough to keep it in mind.
B-Tier Pokémon
Sinistcha
Sinistcha is a Pokémon that performs well, but only under fairly specific conditions. It's best reserved for Double Battles, since it's unlikely to hold its own in a Single Battle setting.
In Doubles, its Hospitality ability restores a portion of an ally's HP on entry, and it brings useful support moves like Trick Room, Matcha Gotcha, and Rage Powder. Since Sinistcha is primarily a support Pokémon, prioritizing defensive stats over offensive ones makes the most sense.
If you're running Incineroar, Sinistcha is close to a free pick: Rage Powder lets it redirect Fighting-type attacks away from Incineroar and onto itself, where it can tank the hit far more comfortably. The same strategy works well alongside several other Pokémon on this list too.
Conclusion
This Pokémon Champions tier list is a snapshot of the current meta, not a fixed ruleset. Garchomp and Sneasler earn their SS-tier status through sheer consistency, while Pokémon like Charizard, Froslass, and Pelipper show just how much weather-setting abilities are shaping team building right now. Even so, tier placement only tells part of the story. A well-piloted B-tier Pokémon can still outperform a poorly built SS-tier team, so use this list as a starting point for your roster, not a substitute for learning matchups, building synergy, and adapting as the meta inevitably shifts.