How to configure virtualization memory
1. On the desktop, right-click the "This PC" (or "My Computer") icon and select Properties to access system information. Then click the "About" button.
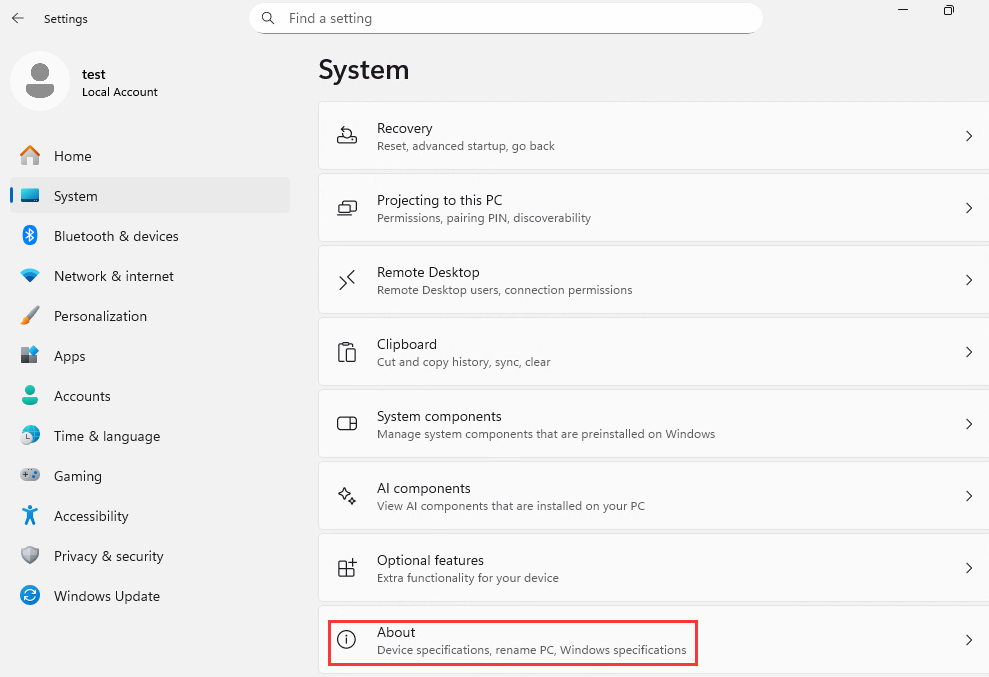
2. In the System settings window, select Advanced system settings (refer to the image).

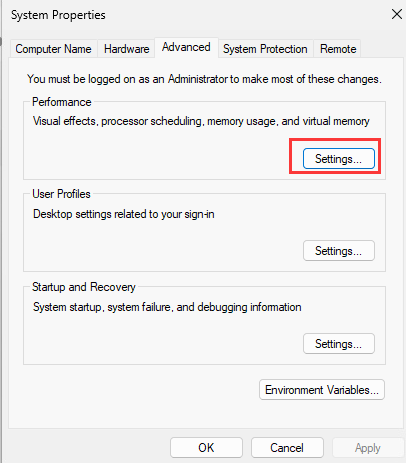
3. Within the System Properties window, navigate to the Advanced tab and click the Settings... button under the Performance section (refer to the image).
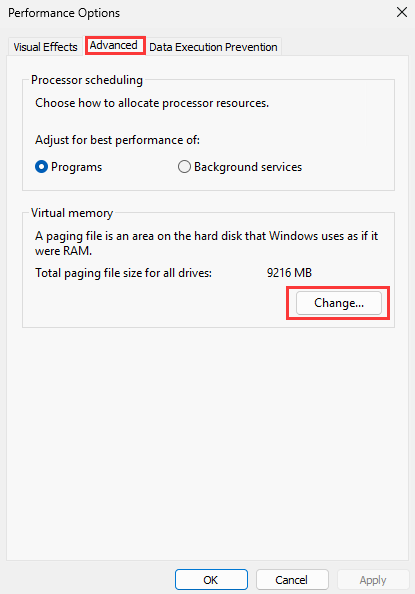
4. In the Performance Options window, go to the Advanced tab. Under Virtual memory, click the Change... button (refer to the image).
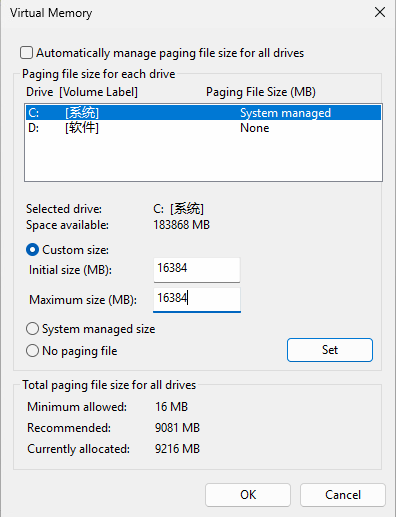
5. On the Virtual Memory screen:
- If the fields for custom size are grayed out, first uncheck the box for "Automatically manage paging file size for all drives."
- Select Custom size.
- Set the Initial size (MB) and Maximum size (MB) to 16384.
- Click the Set button, then click OK (refer to the image).
6. Click OK on all remaining open windows to confirm. You will need to restart your computer for the changes to take effect.